


Be sure to subscribe to our newsletter for other Ghost tutorial!
Recently when I changed my blog from WordPress to Ghost, I've run to some problems because it was my first time setting up a Ghost blog. I decided to write this article on how to set up a self-hosted Ghost so you can avoid having the same problem as I am.
What is Ghost blogging platform
I'm sure if you opened this article, you already know at least a bit about Ghost. Ghost is a headless CMS built specifically for blogging built on top of JavaScript and NodeJS. It's a very fast, doesn't need a lot of resources and has clean UI UX. Ghost is first released in October 2013, making its age over 7 years as of this article.
Why choose self-hosted Ghost
You have two options if you want to use Ghost. The first option is to use their hosting service, and the second option is by hosting the Ghost at the server you choose.
Both options are good and have advantages and disadvantages. But the most notable different is the price.
The cheapest plan in hosted Ghost is $29 a month billed yearly, and it still doesn't come with a free domain. It's not suited for someone or a business that has just starting out.
If we compare it to DigitalOcean, the cheapest droplet we can buy is $5 a month billed monthly, I tested on my blog and it works just fine. We can also upgrade and downgrade the droplet as we want when we need it.
We can see that hosted Ghost is almost 6 times more expensive than self-hosted one. For that reason alone, you should consider using self-hosted Ghost.
Accounts that you need for self-hosted Ghost
In this section I will write about which account I created for my self-hosted Ghost. You don't need to use the service I chose, but in this article I will only explain with the service I chose.
Hosting
I use DigitalOcean for hosting. I've heard a lot of good things about it, and I also have an enjoyable experience using it before. It's a very cheap and easy-to-use VPS Hosting with a price starting at $5 a month.
Domain
I registered my domain at Namecheap. Namecheap is a very popular and easy-to-use domain registrar with a competitive price. This is the first time I bought a domain here and I'm recommending it.
Content Delivery Network (CDN)
I use Cloudflare, a very popular and free CDN, on my blog. Using CDN will reduce your site's response time while also adding its security. I recommend using CDN for every site you have.
Business Email (Optional)
I use Private Email by NameCheap for my business email (admin@codecurated.com). You can buy it together with a domain in Namecheap. You can also use it as an SMTP client for member sign-in and sign-up, so it's recommended to have one.
Buying Domain on Namecheap
For buying your domain, I recommend Namecheap because of its popularity and its competitive price.
The first thing you need to do to buy a domain there is to register.
After you're done with the registration, go to the homepage and type the domain you want to buy in the search bar.
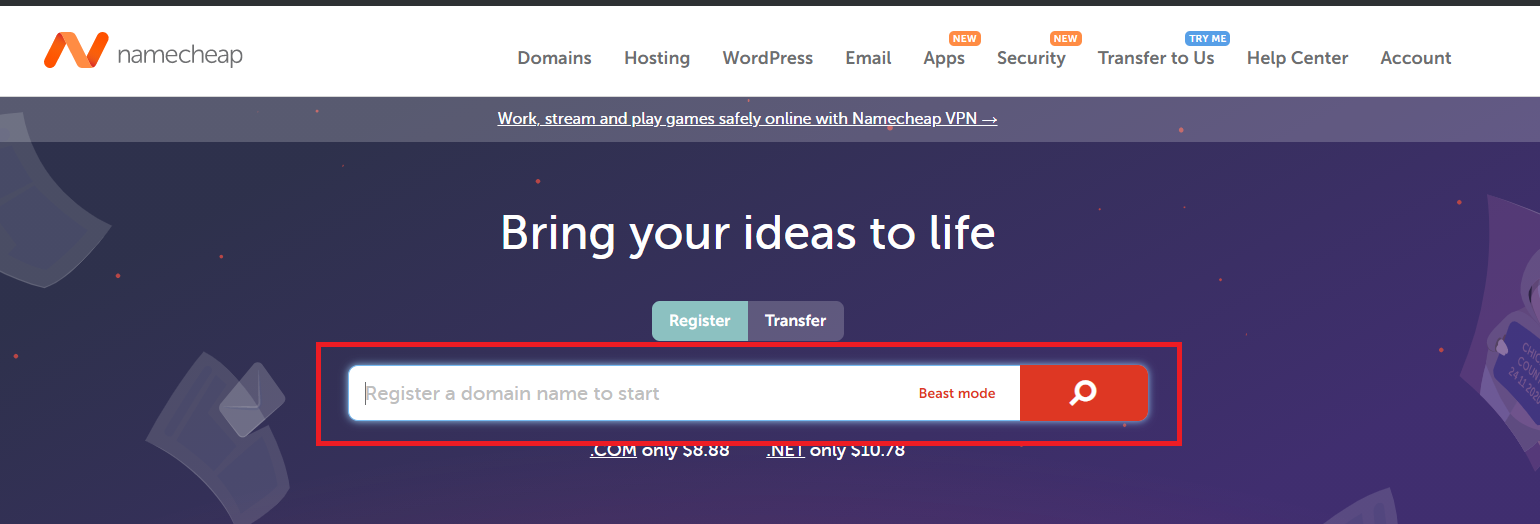
If the domain name you chose is available, you will see the screen below. In this example, I wanted to buy codecurated.link.

After you're done adding the domain to the cart, click "Checkout" at the bottom of the page.

After that Namecheap will redirect you to checkout page, In this page there are a few things you need to do. I'll explain it by the numbers I wrote at the picture:
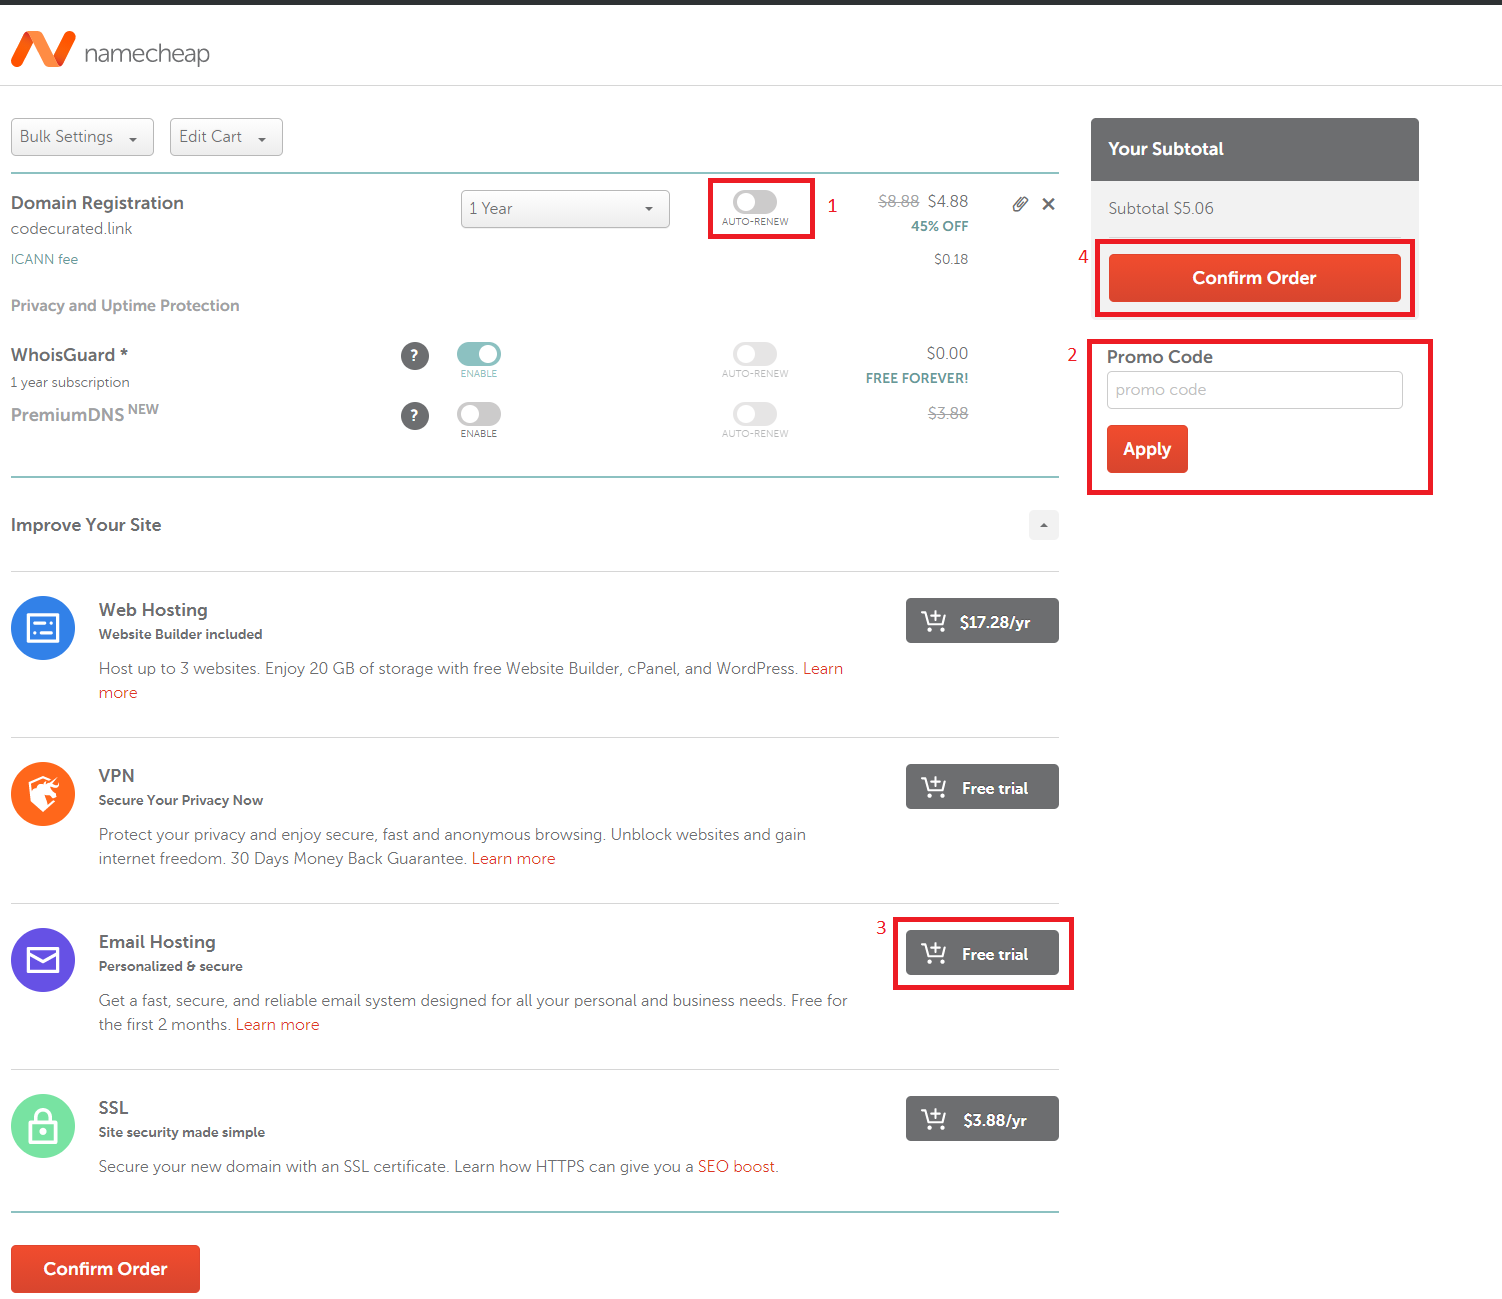
- Auto domain renewal. if you turn this on, then Namecheap will automatically renew your domain when it expires.
- Insert your promo code here if you have one. Currently Namecheap is having a Black Friday deal, you can use
BFTLDREGto get a cheap domain. - Adding email hosting will allow you to use it for business email (e.g. admin@codecurated.com). You can also use the email's SMTP to send sign-up and sign-in login email for your Ghost blog.
- After you're set, click "Confirm Order".
After that, Namecheap will redirect you to the payment page. Make sure that everything is as you want, after that purchase it. You will receive an email for purchase confirmation if everything went well.
Congratulations! You've bought a domain, this is the first step towards self-hosted Ghost.
Setting up Private Email
If you bought a Private Email with Namecheap when buying a domain, then you need to set it up.
To set up the Private Email, first you must to open the account dashboard in Namecheap:

After that, search your domain in the "Recently Active in Your Account Section", click the arrow as in the image and then go to "Manage".

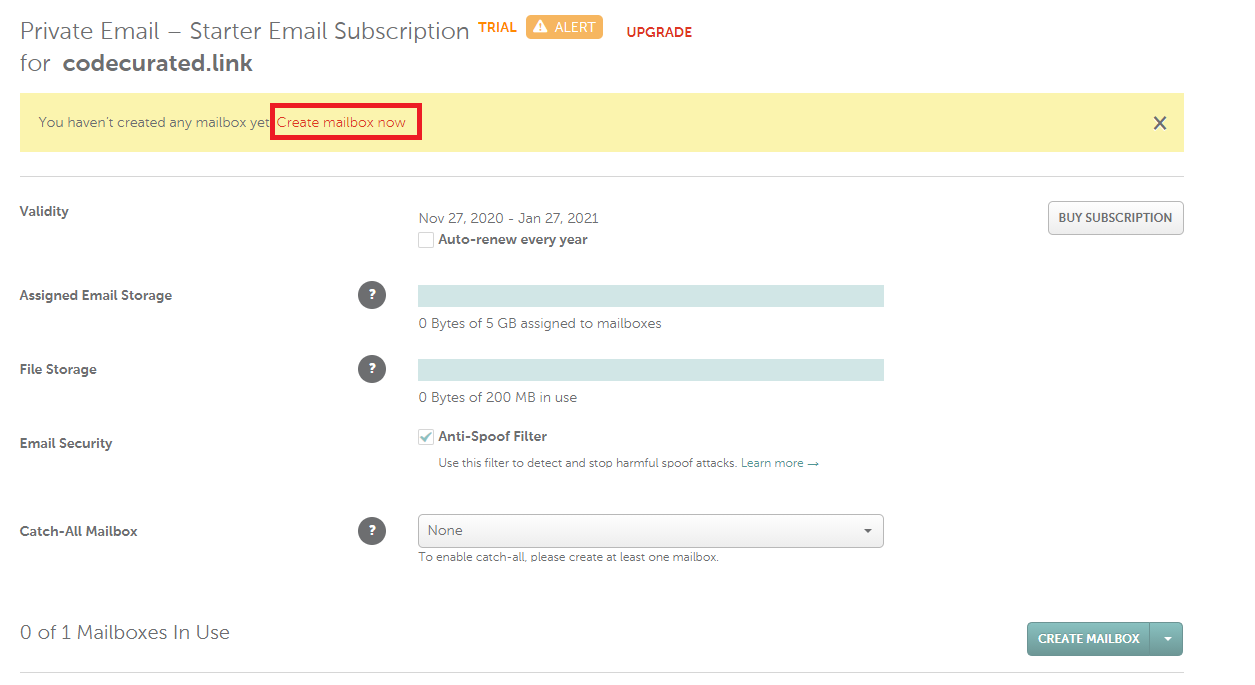
Since you just registered the Private Email account, you don't have any mailbox yet. Let's create a new one by navigating to "Create mailbox now".
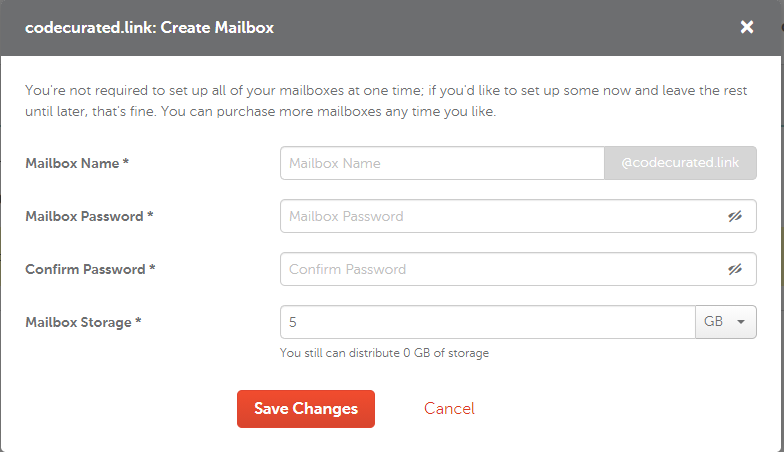
Namecheap will prompt you a pop up as below, fill it with email, password and storage you want. You can change them later by removing and creating a new mailbox. After you're done, click "Save Changes".
That's it! You just created your business email! You don't have to setup the MX in the domain DNS because Namecheap already set it up for you.
To test it, you can go to Private Email site and try logging in with the email and password you provided before.
Creating a Ghost Droplet in DigitalOcean
For Hosting my Ghost blog, I use DigitalOcean. DigitalOcean is a popular hosting provider with a competitive price. I've heard a lot of good things about them and have used them with enjoyable experience for my past projects. You can use my referral to get $100, 60-day credit you can use!
Registering on DigitalOcean
The first thing you need to do for creating a Ghost Droplet is to register on DigitalOcean if you haven't.
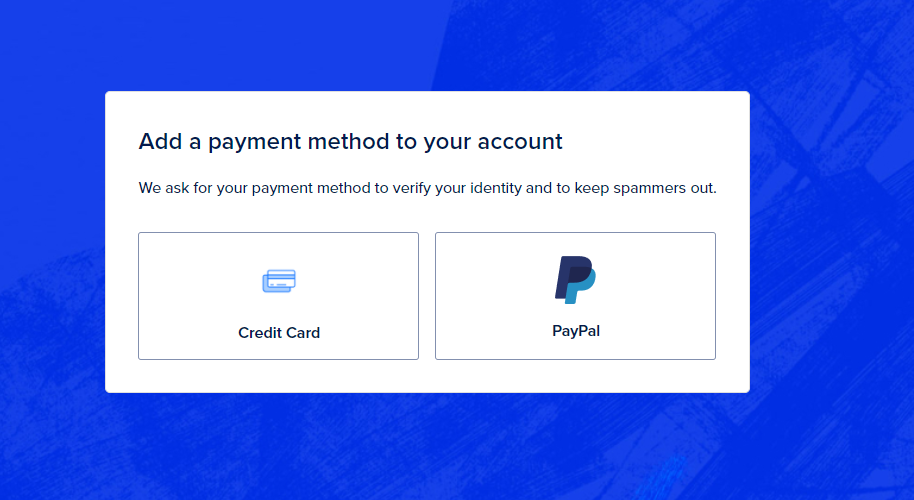
After you've registered and verified your email, DigitalOcean will ask you to choose the payment method. Choose one you prefer and fill out the form accordingly.
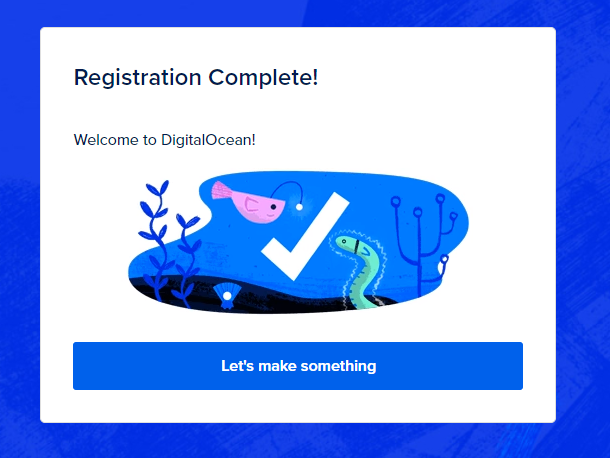
If everything went ok, DigitalOcean will redirect you to the page as below, click "Let's make something".
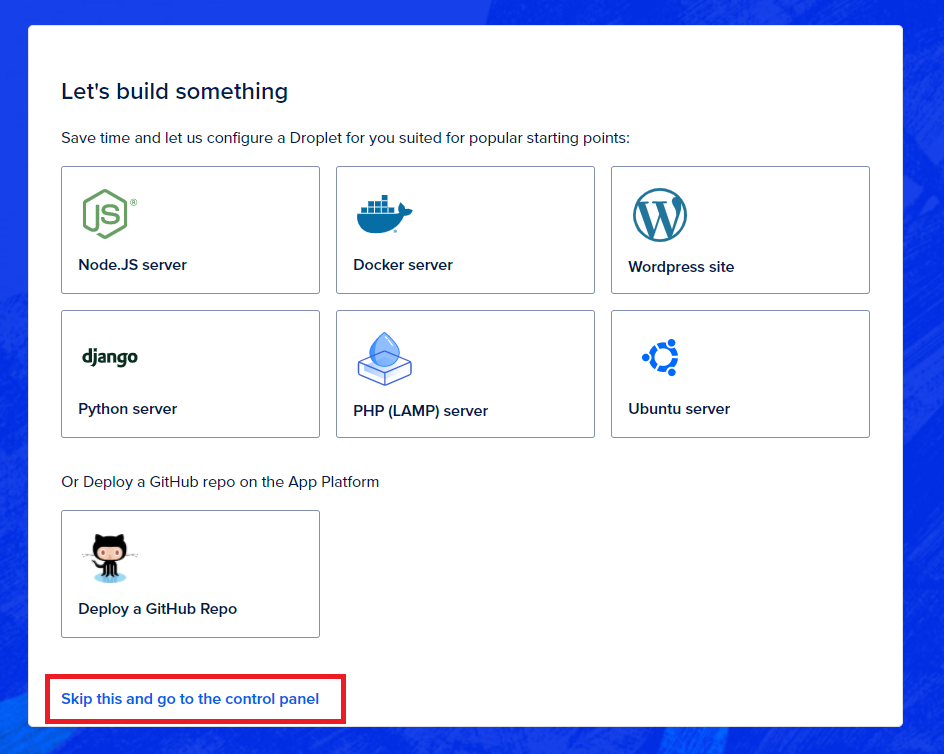
On the next page, DigitalOcean will ask you to configure a droplet. Since we want to create a Ghost droplet and it's not in the option, just click "Skip this and go to the control panel".
After that, DigitalOcean will redirect you to control panel. The first thing you need to do is go to the "Settings" tab and configure the project name, description and purpose.
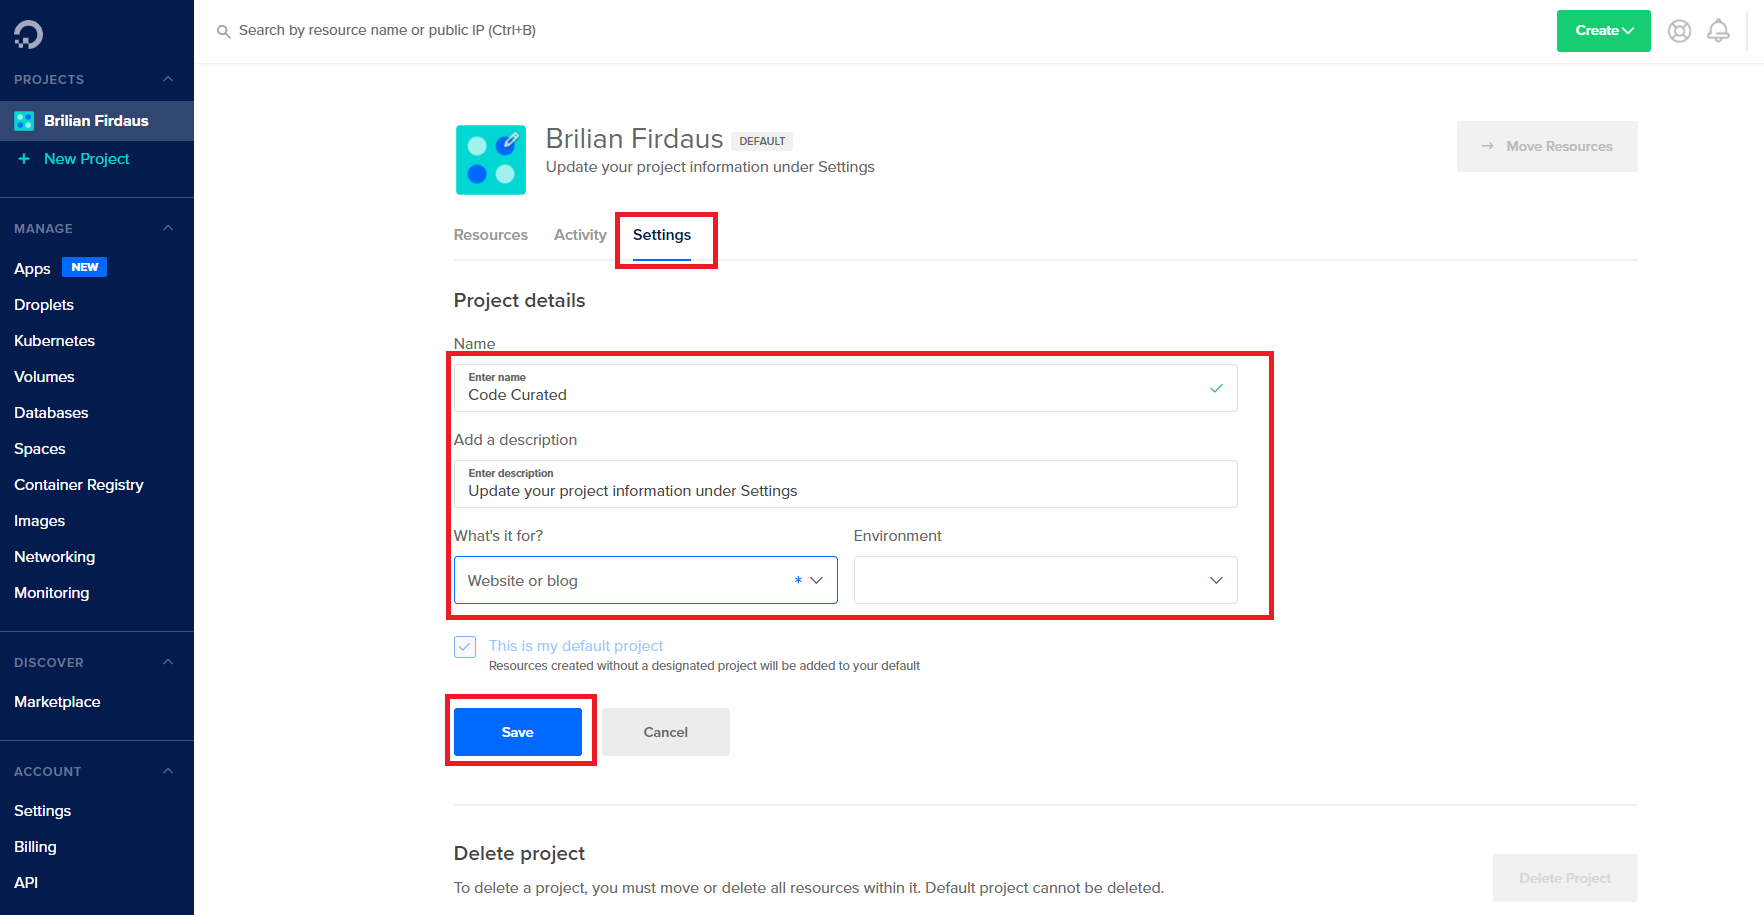
After you're done, click "Save".
Setting up SSH key (Optional)
Since we will need to access the droplet via SSH, we'll first need to set up an SSH Key. SSH key is a key that will let you connect to the droplet. It's a security measure to make sure that only a PC with a registered key may access the droplet.
To set up an SSH key, DigitalOcean already has a very good documentation in their website.
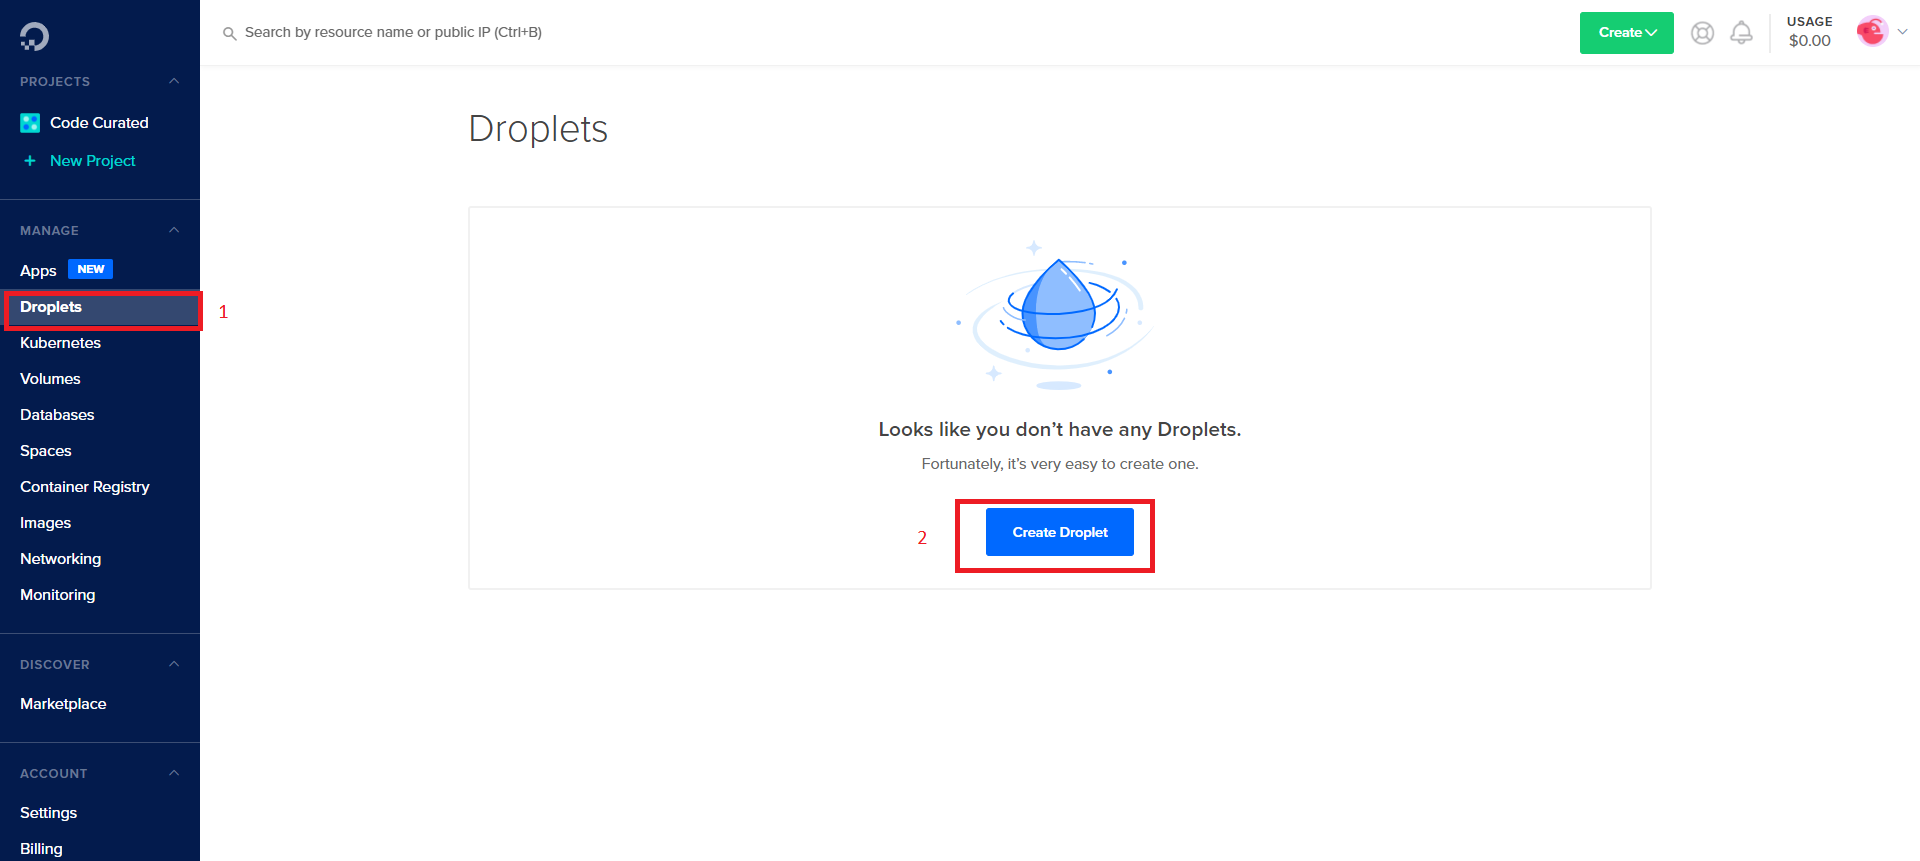
Creating a Droplet
To create a droplet, you'll first need to navigate to Droplets section in the left bar and then click "Create Droplet".
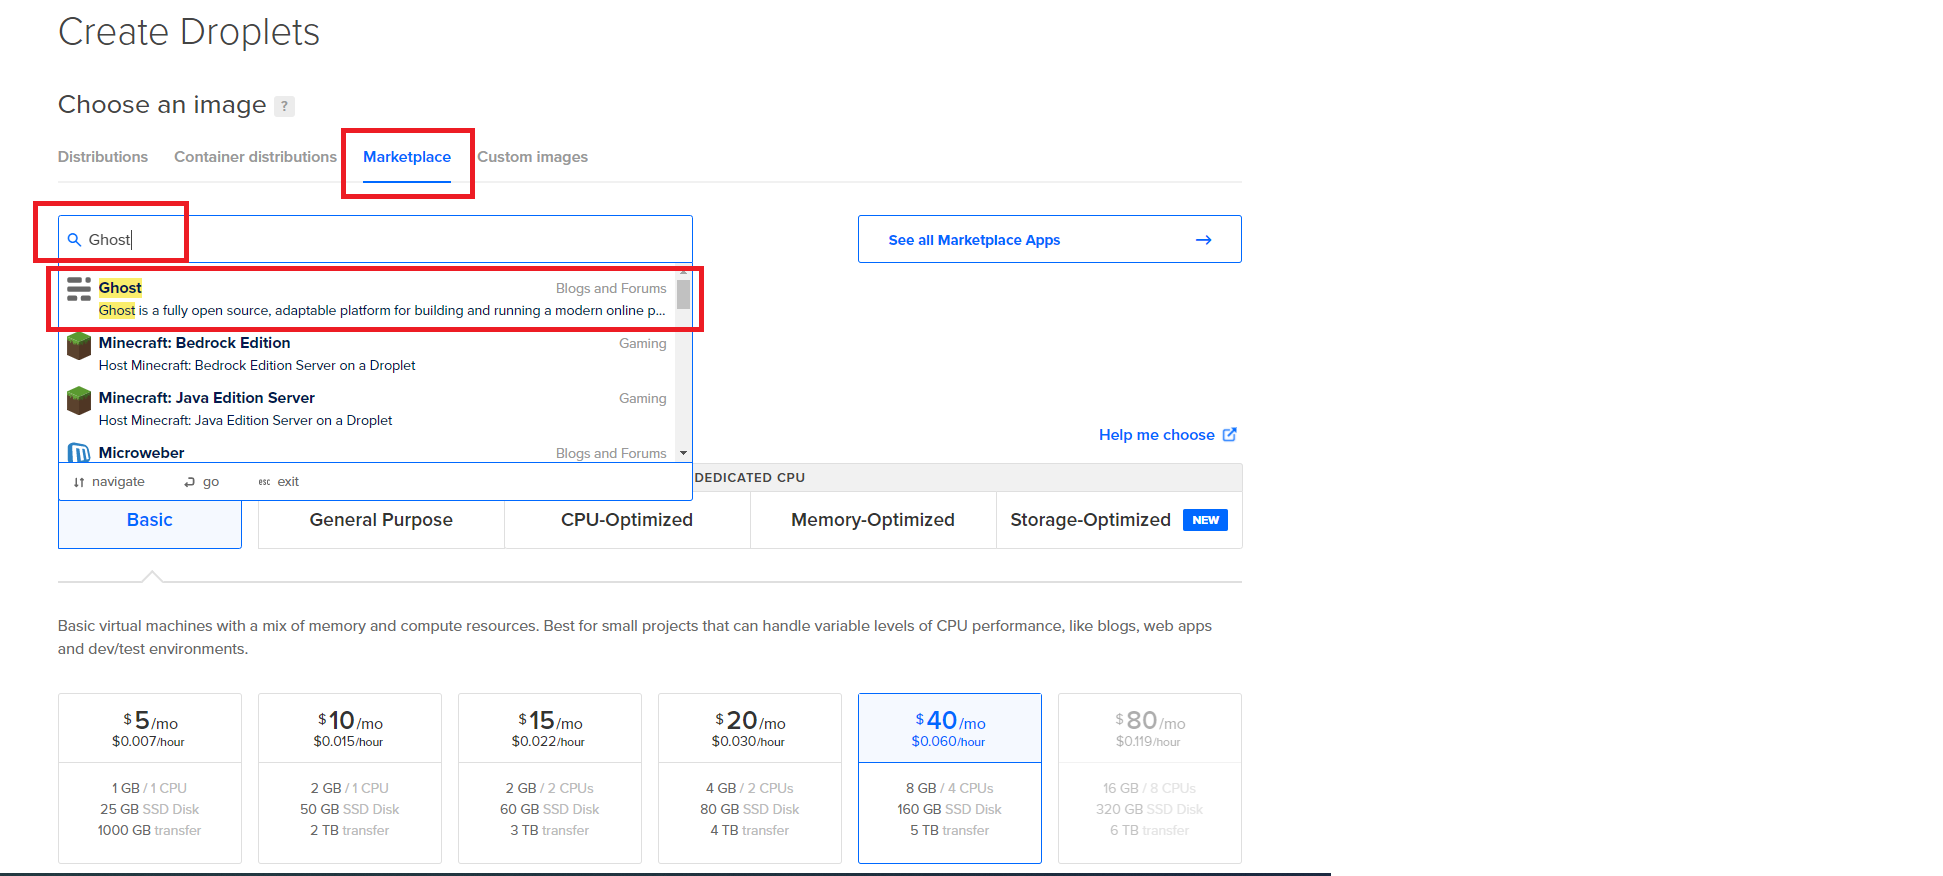
After that, DigitalOcean will redirect you to Create Droplets page. Go to Marketplace tab, type Ghost on the search bar, and then click Ghost result.
Now let's setup our droplet! In this article, I will only write the mandatory setup needed to make your Ghost droplet up and running. You can explore the DigitalOcean's other features and apply it yourself.
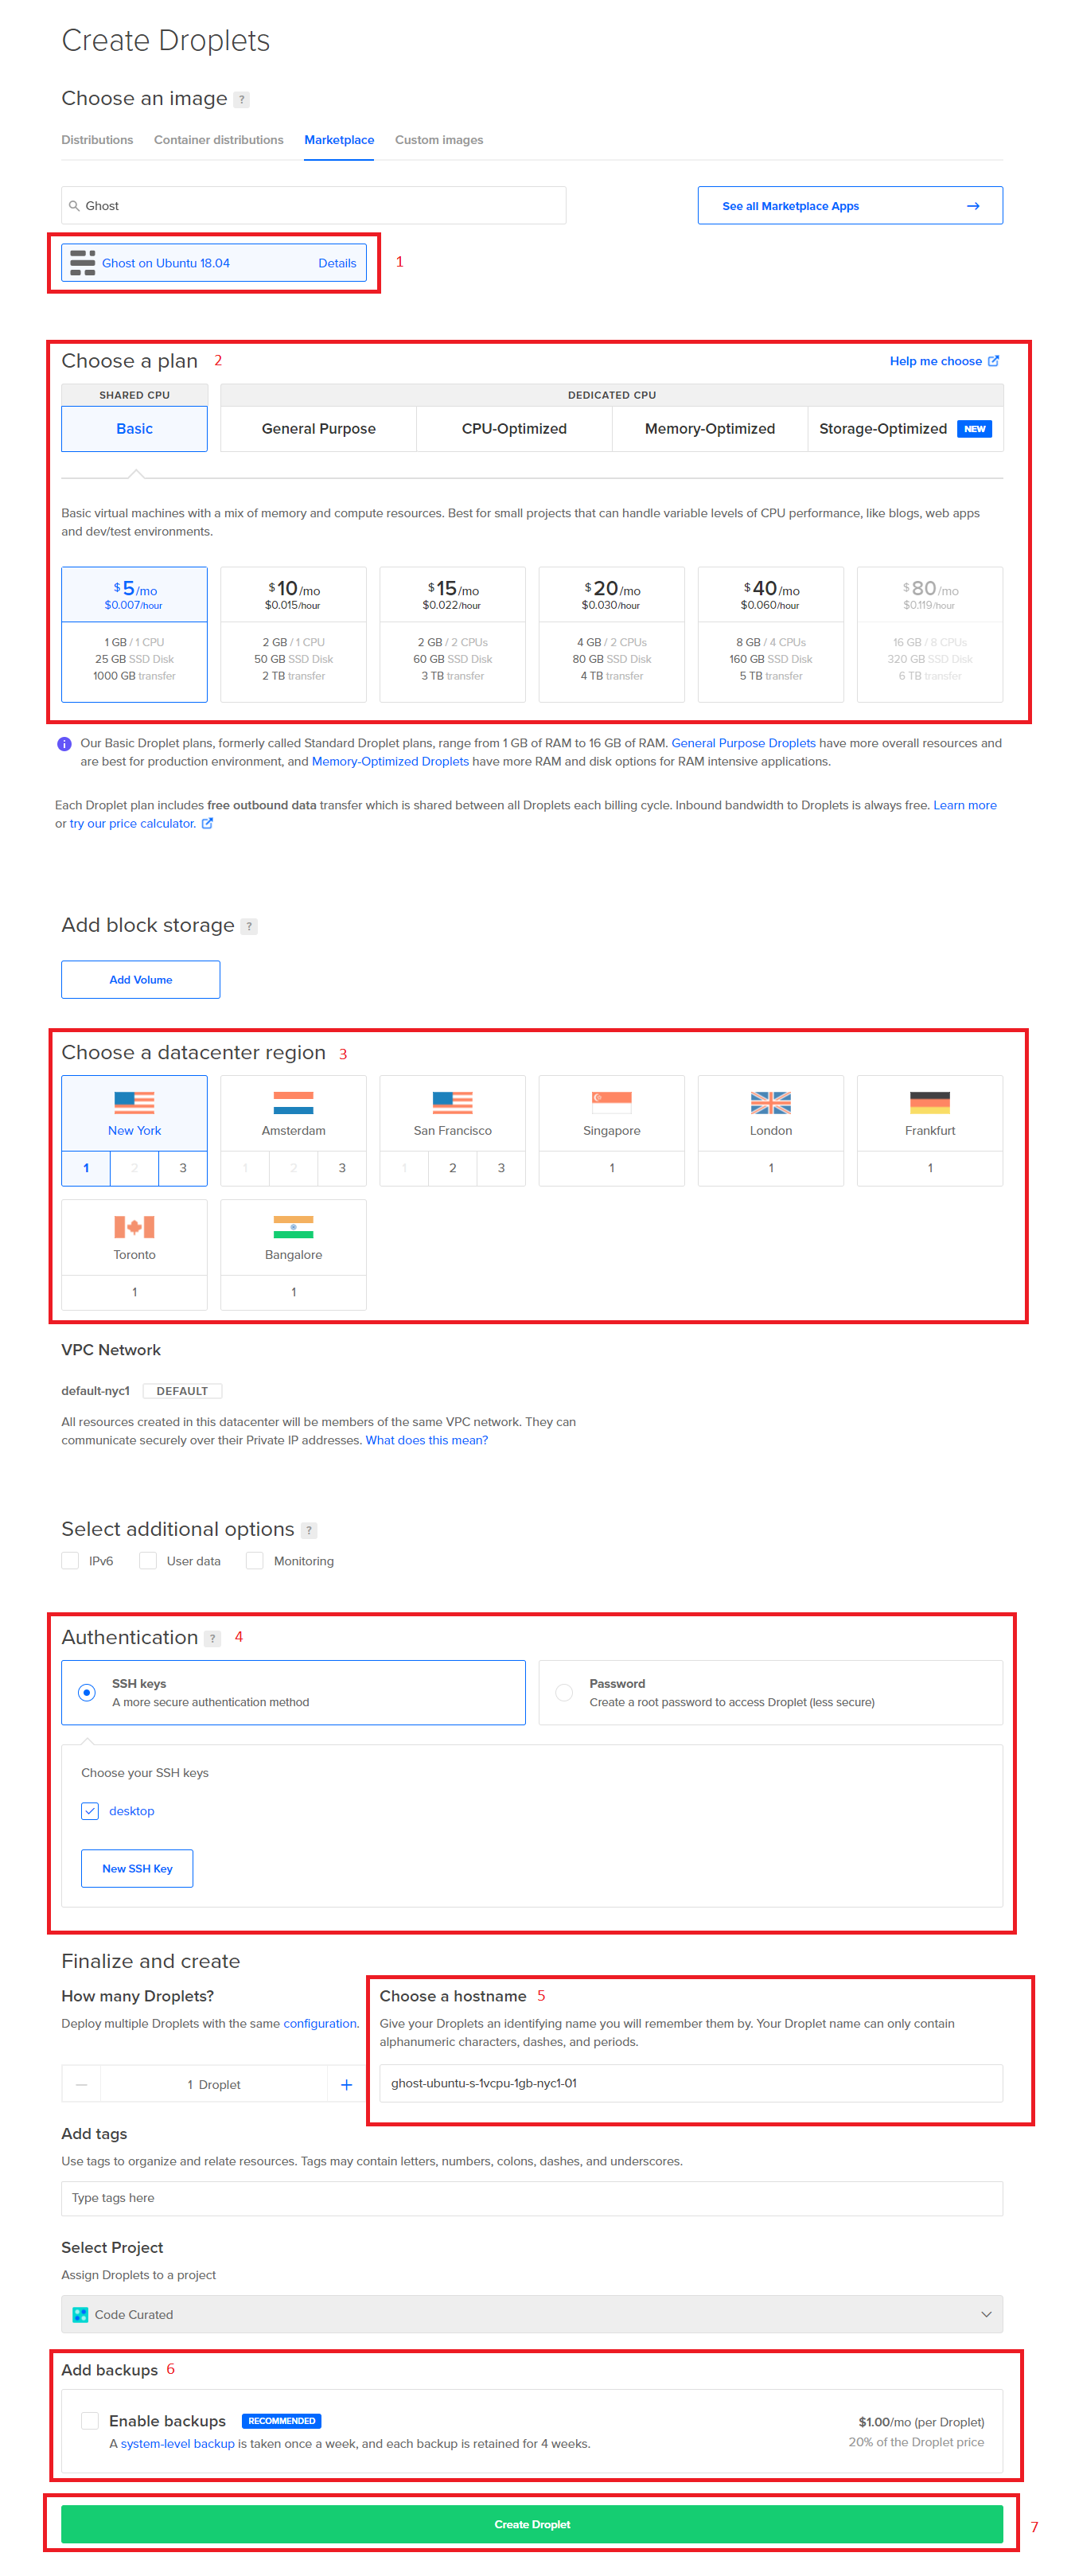
In the image above, I've written some numbers in which I will explain here:
- Droplet type, choose Ghost so DigitalOcean will install everything you need for Ghost when creating the droplet.
- Plan, for starting I recommend just using the cheapest one, it's enough.
- Data center, choose where your target audience live, if this confuse you then just choose US server.
- Authentication, you need to choose how the droplet will authenticate your account when you do an SSH later on. In this example I chose SSH key, but if you haven't setup your SSH key, then you can use password instead.
- Your droplet name, you can fill it by anything you want
- Add weekly backup of your droplet, you can also enable this later.
- If you're already sure with your option, click "Create Droplet"
If everything went fine, then you should see the droplet under your project.
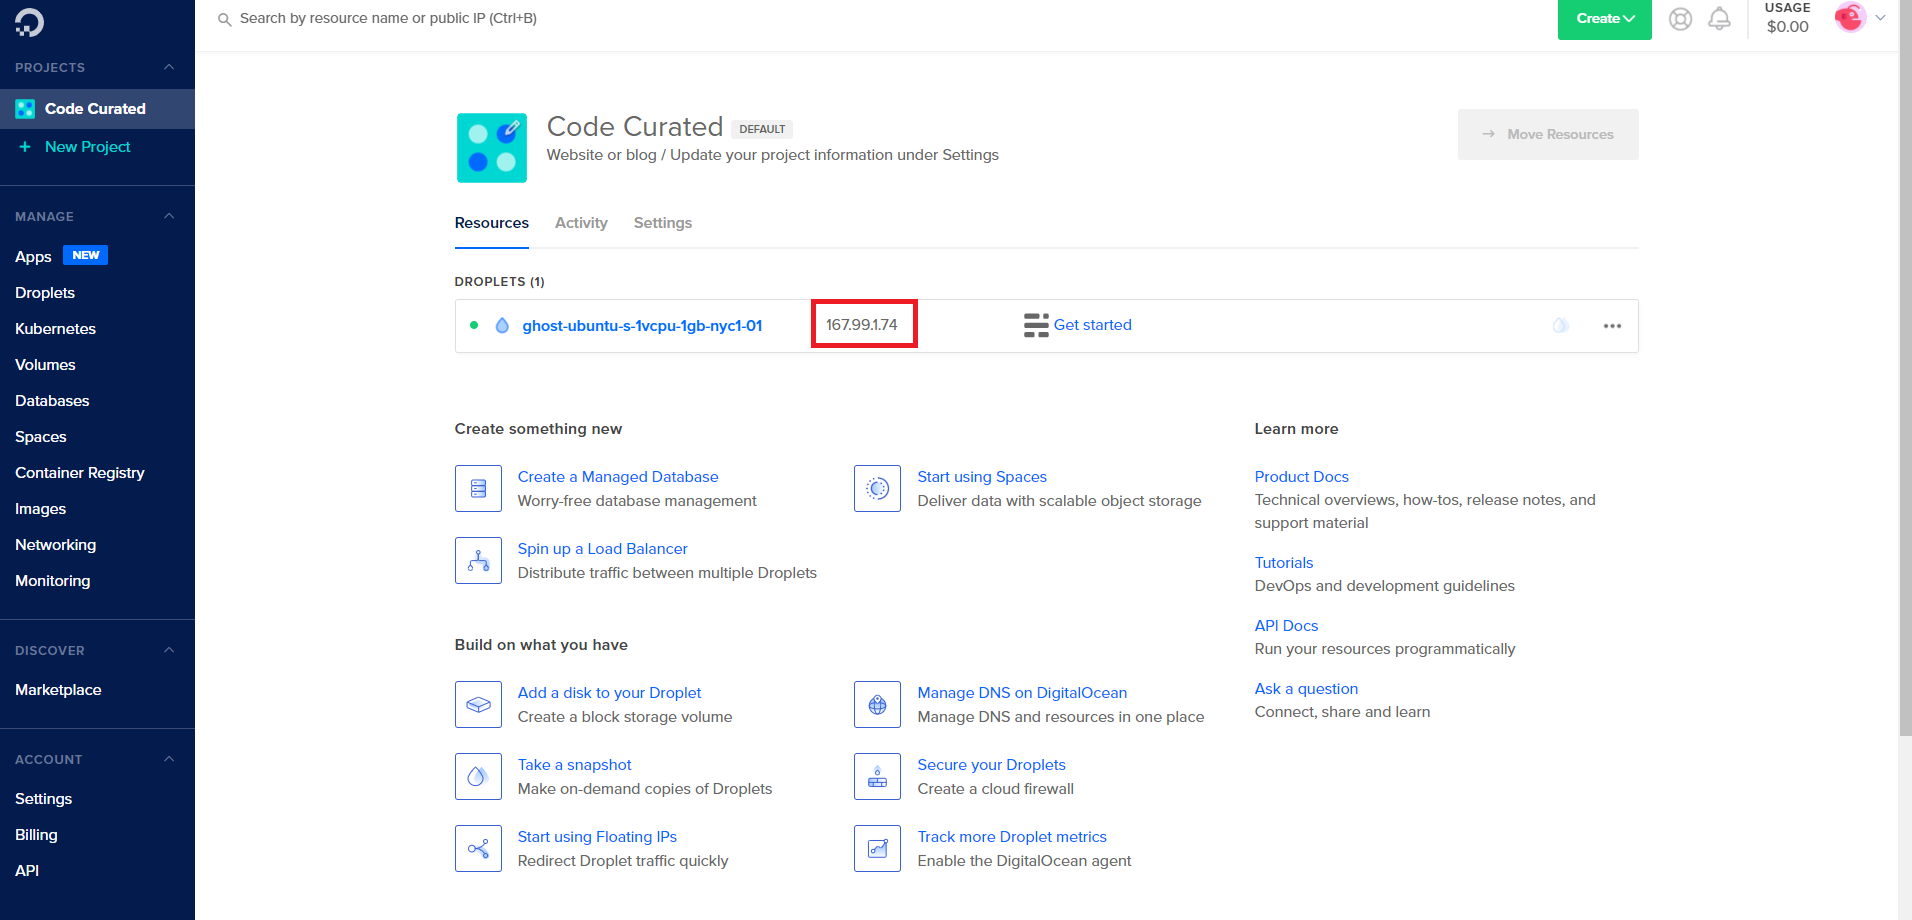
You can validate whether the IP works by visiting it. You should see:
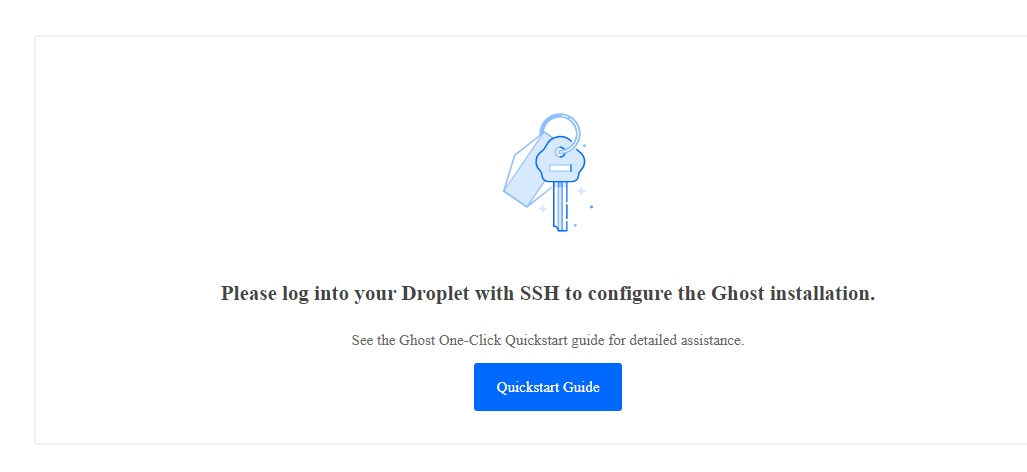
Nice! Now you have a droplet containing Ghost, as you can see you must log into your droplet via SSH to finish Ghost installation. But let's come back to it later, for now we'll setup our CDN first.
Setting up Cloudflare CDN to your domain
I recommend you to set up a CDN on all your sites. CDN will add a layer of security for your site and also fasten the response time. You can read more about how they do it here. Cloudflare is a very popular and free to use CDN, for starter I recommend you to use it.
Registering on Cloudflare
To register on Cloudflare, go to their sign-up here and fill Email and Password. After that click "Create Account"
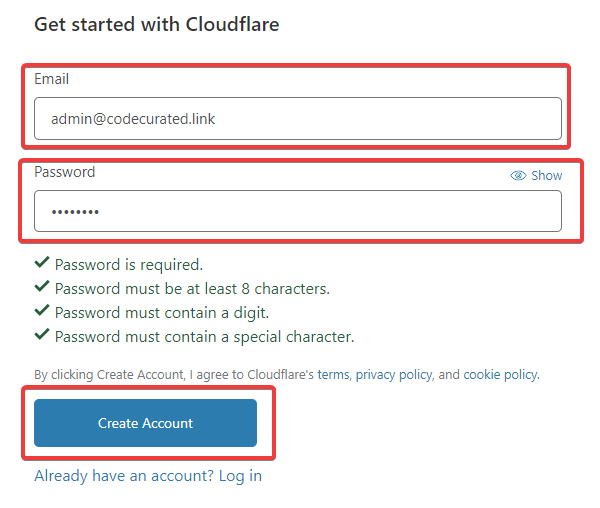
After that Cloudflare will send you an email containing link for verifying your account. Open your email and verify it.
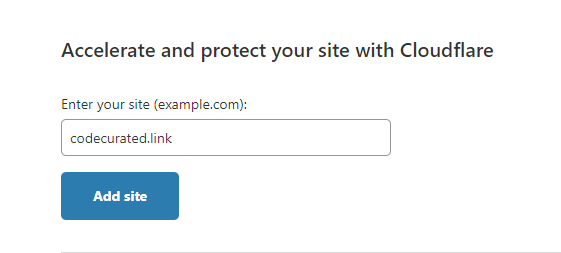
Adding our domain to Cloudflare
After clicking "Create Account" you'll also redirected to a new page, insert the domain you've bought and click "Add site".
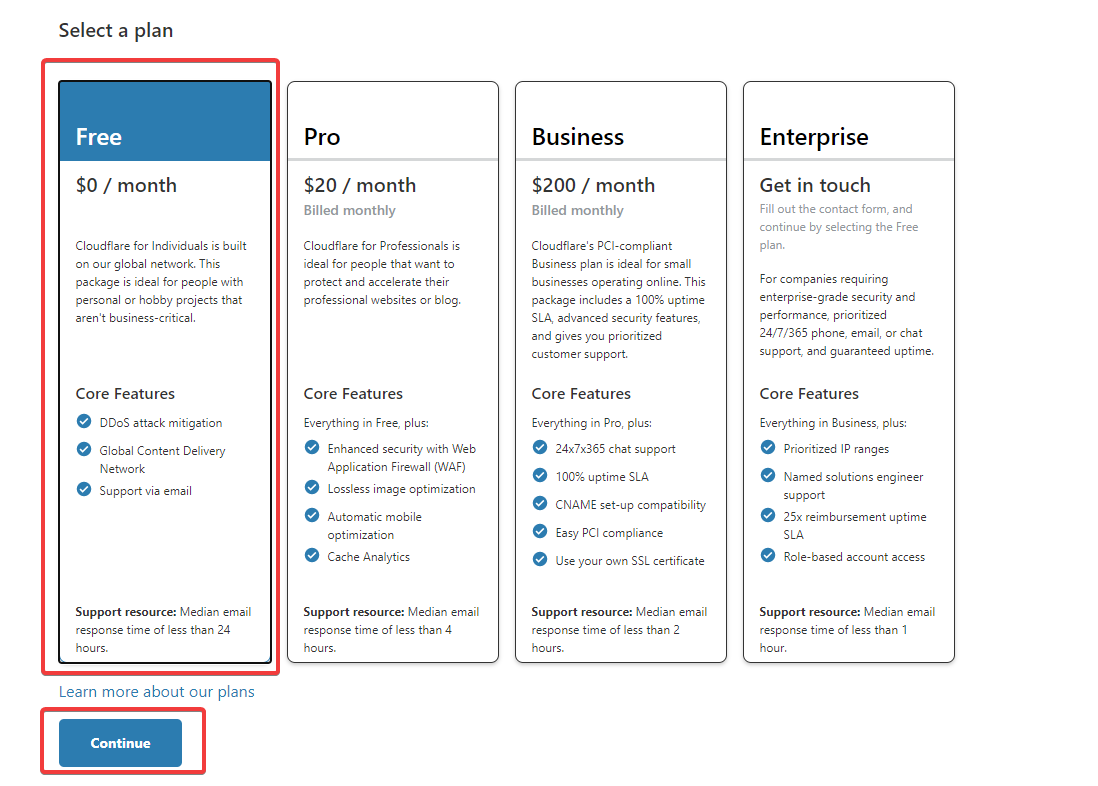
Cloudflare will ask you to choose which plan do you want, pick free one and then click "Continue".
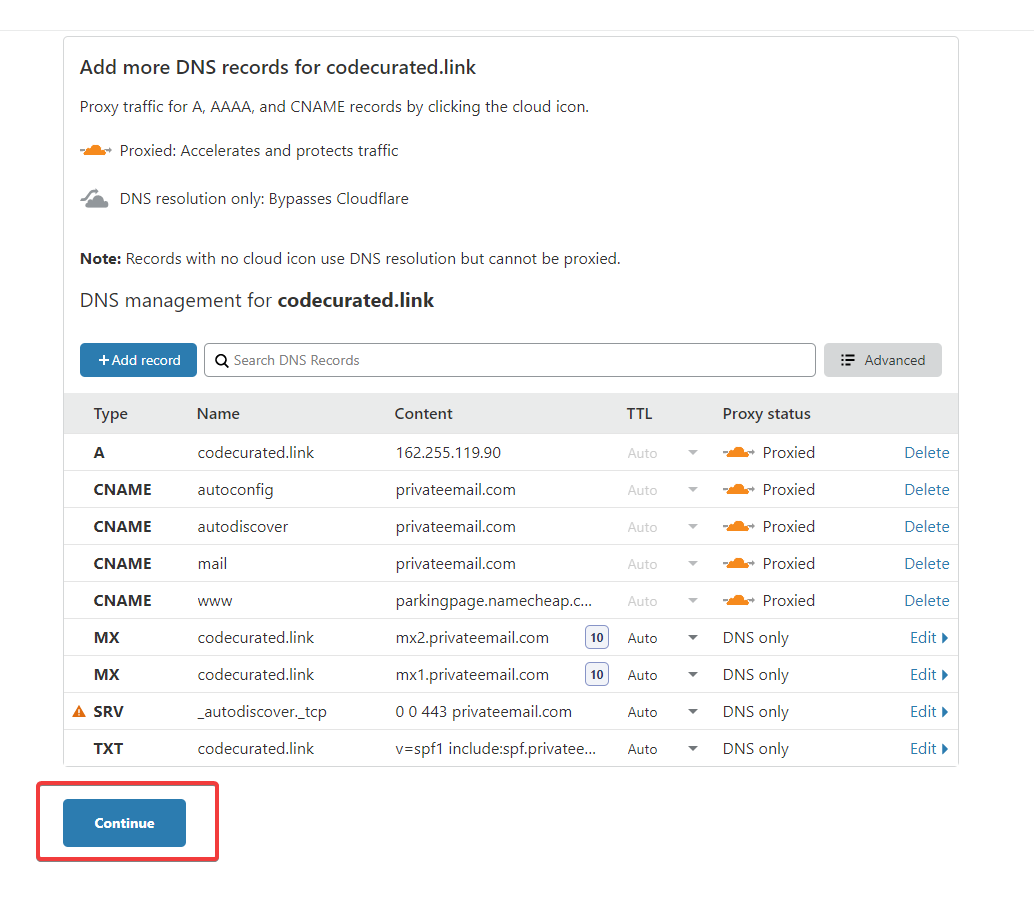
Cloudflare will prompt your DNS records for your domain, for now you don't have to do anything, so just click "Continue".
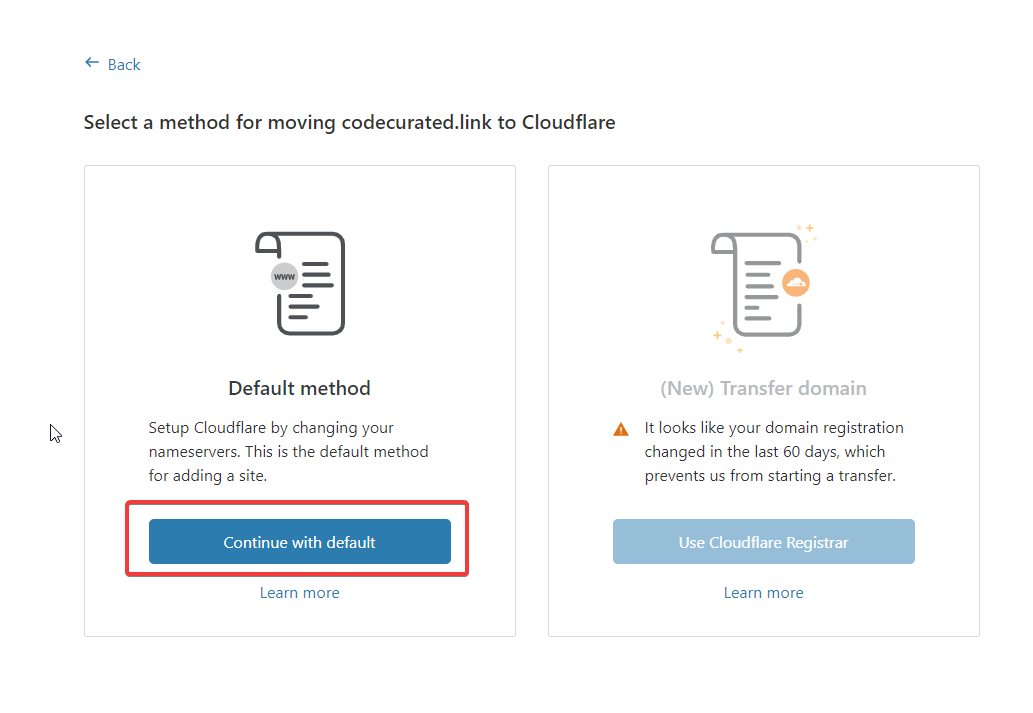
After that Cloudflare will ask you which method do you want for moving your domain to Cloudflare, choose the default one.
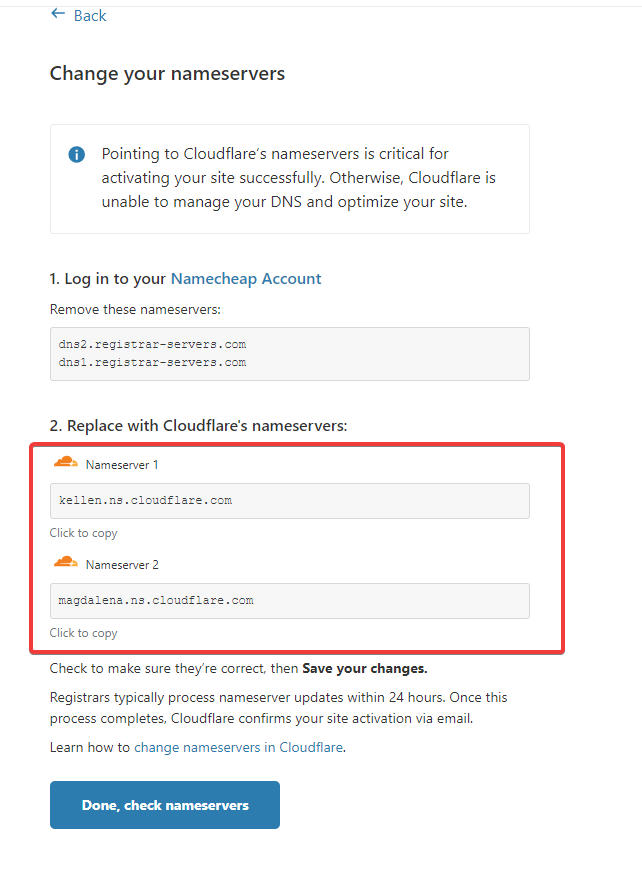
They'll ask you to point your domain nameserver to Cloudflare's. Write the text in Nameserver 1 and Nameserver 2. In my case it's kellen.ns.cloudflare.com and magdalena.ns.cloudlfare.com, but yours might be different.
Changing your domain's nameserver to Cloudflare nameserver
The next step is to open Namecheap, open your dashboard, and click "Manage" on the domain you want.

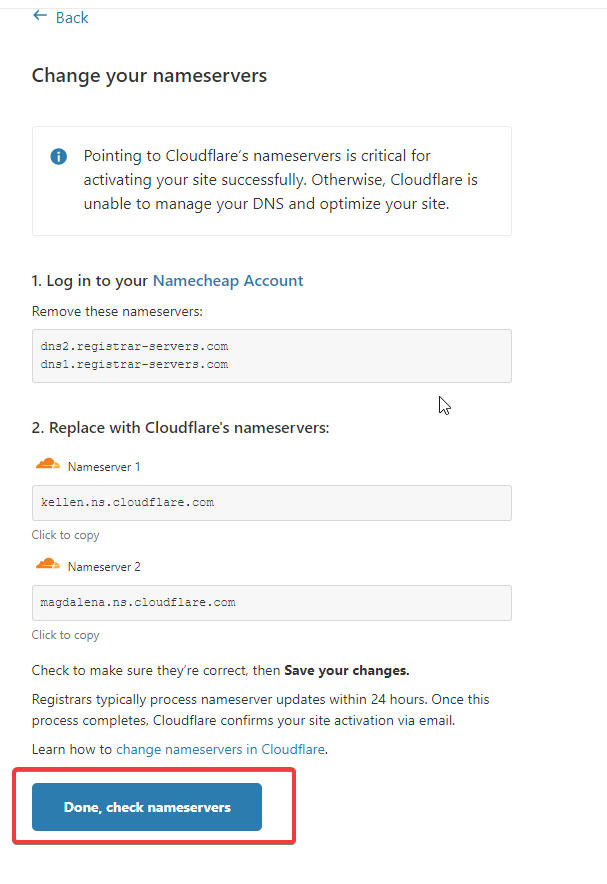
After that go to Nameservers row, change it to "Custom DNS" and add the nameservers you've got from Cloudflare. Click the tick mark after you're done.

After you're done go back to Cloudflare and click "Done, check nameservers".
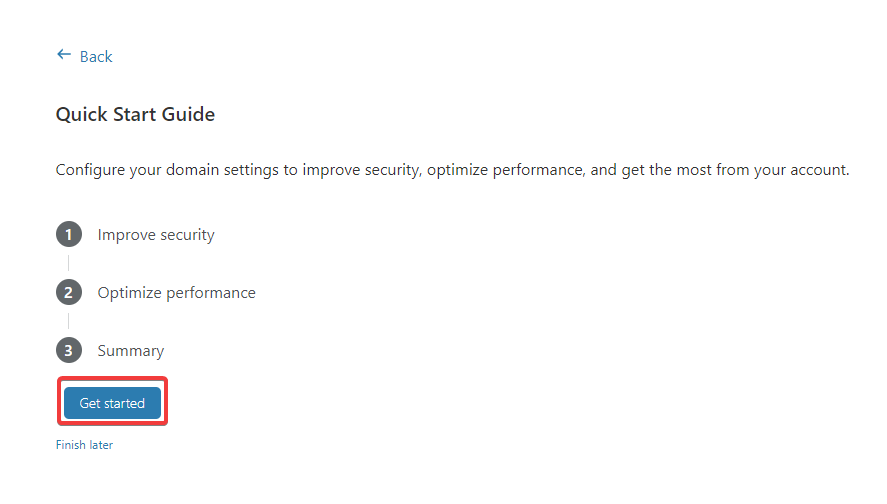
After that, Cloudflare will redirect you to Quick Start page, click "Get Started".
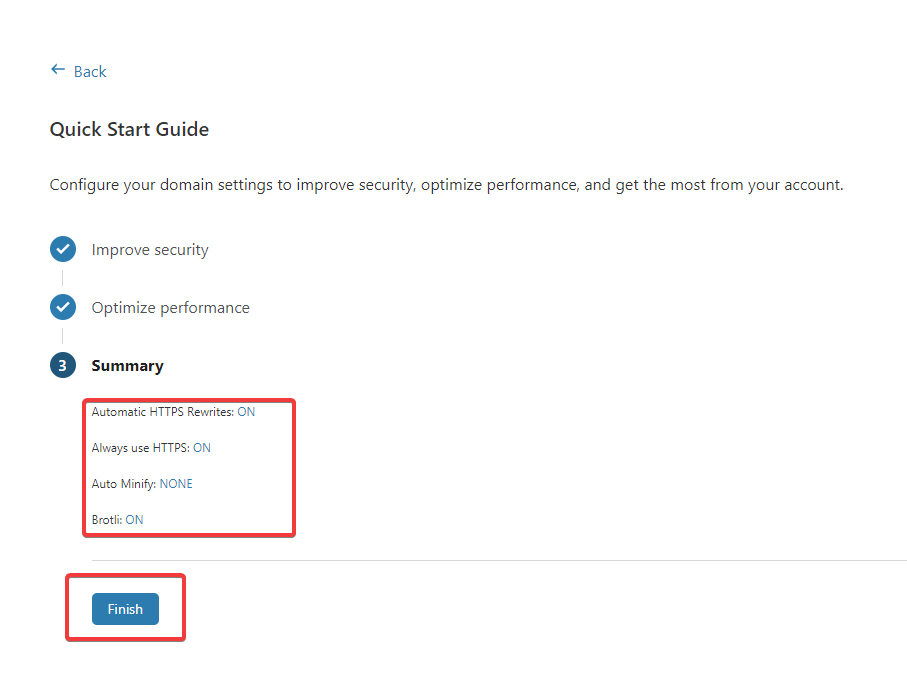
My recommendation is to turn on Automatic HTTPS Rewrites and Always use HTTPS. You can leave other settings as the default.
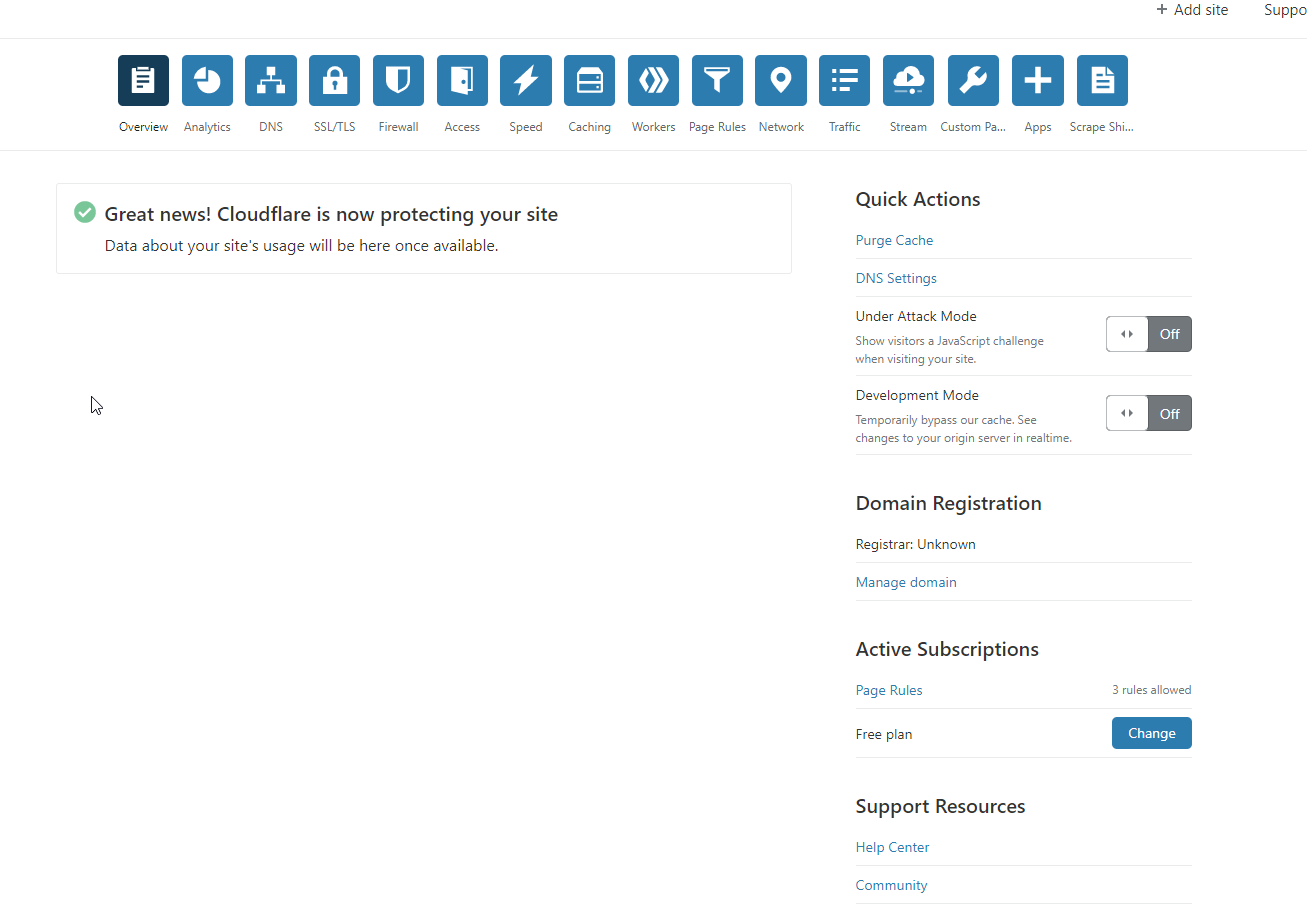
If everything went fine, you will see this page:
If you still see nameservers setup page, then wait a moment and then click "Recheck now" in the page.
Setting your domain in Cloudflare to point to your droplet
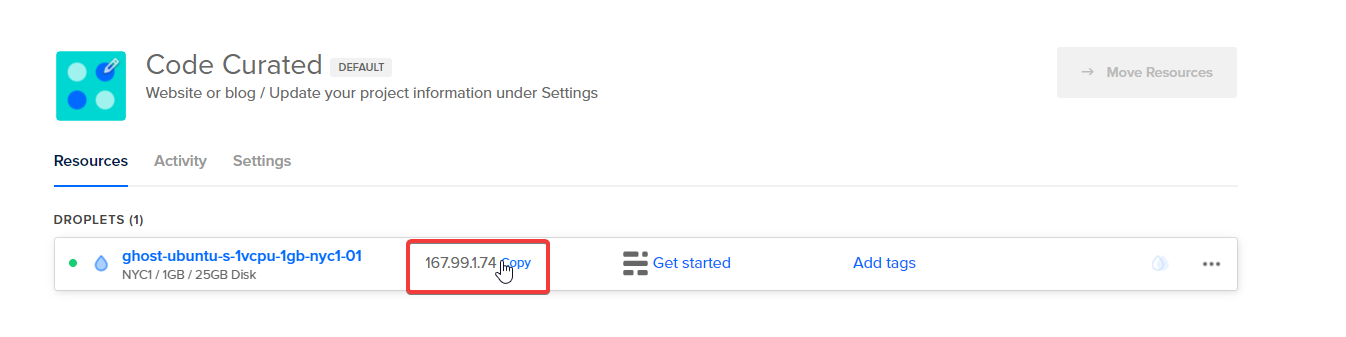
Now it's time to point your domain to the droplet you've created in the previous section. The first thing you need to do is to open DigitalOcean project dashboard and copy your droplet's IP.
After that, go back to Cloudflare go to the DNS tab and edit a record of type "A" and your domain name.
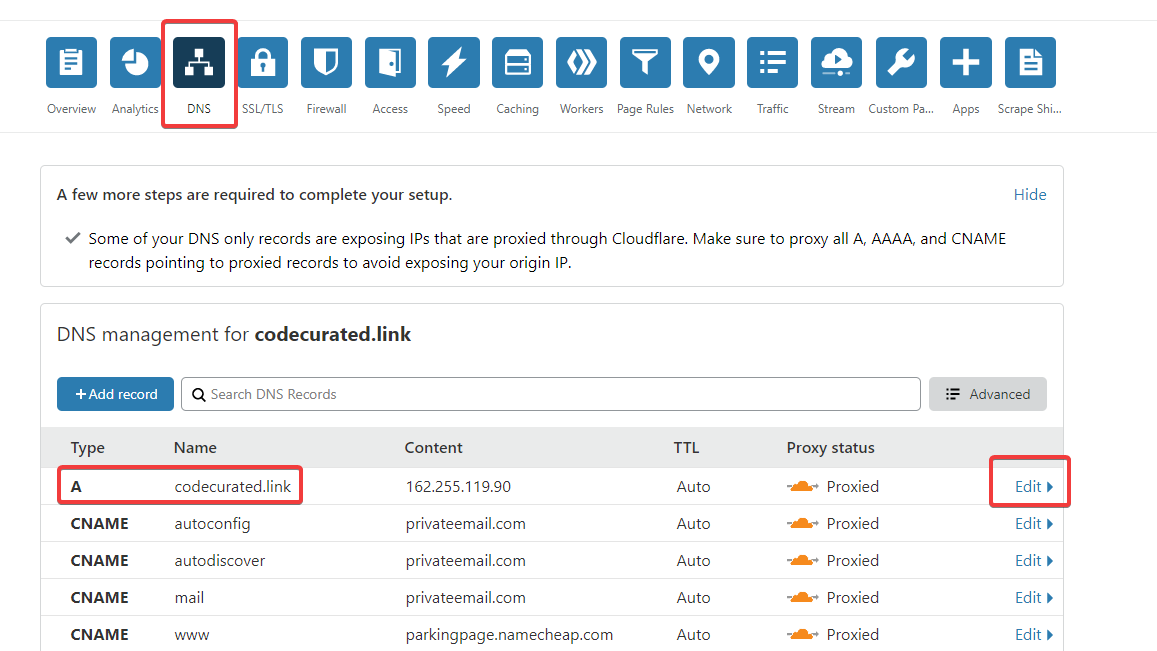
Paste your droplet's IP to IPv4 address field and click save.

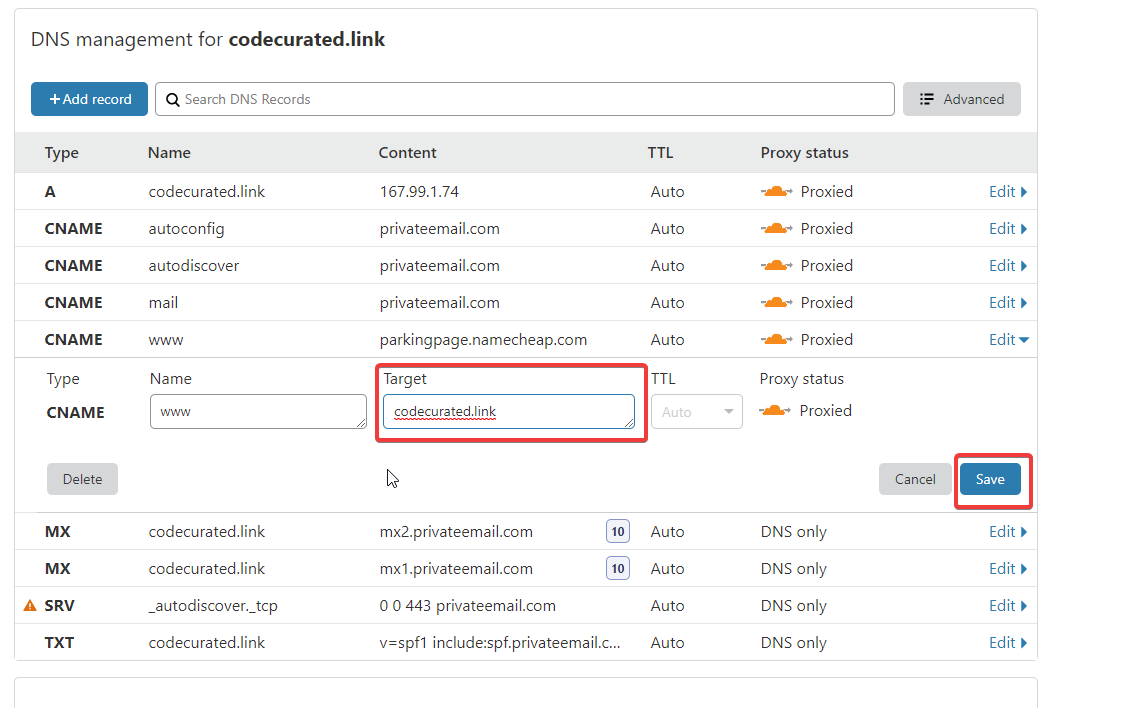
You also need to change a DNS record with name "www". Change the target to your domain name.
After you're done, go to your domain name. You should see this screen:
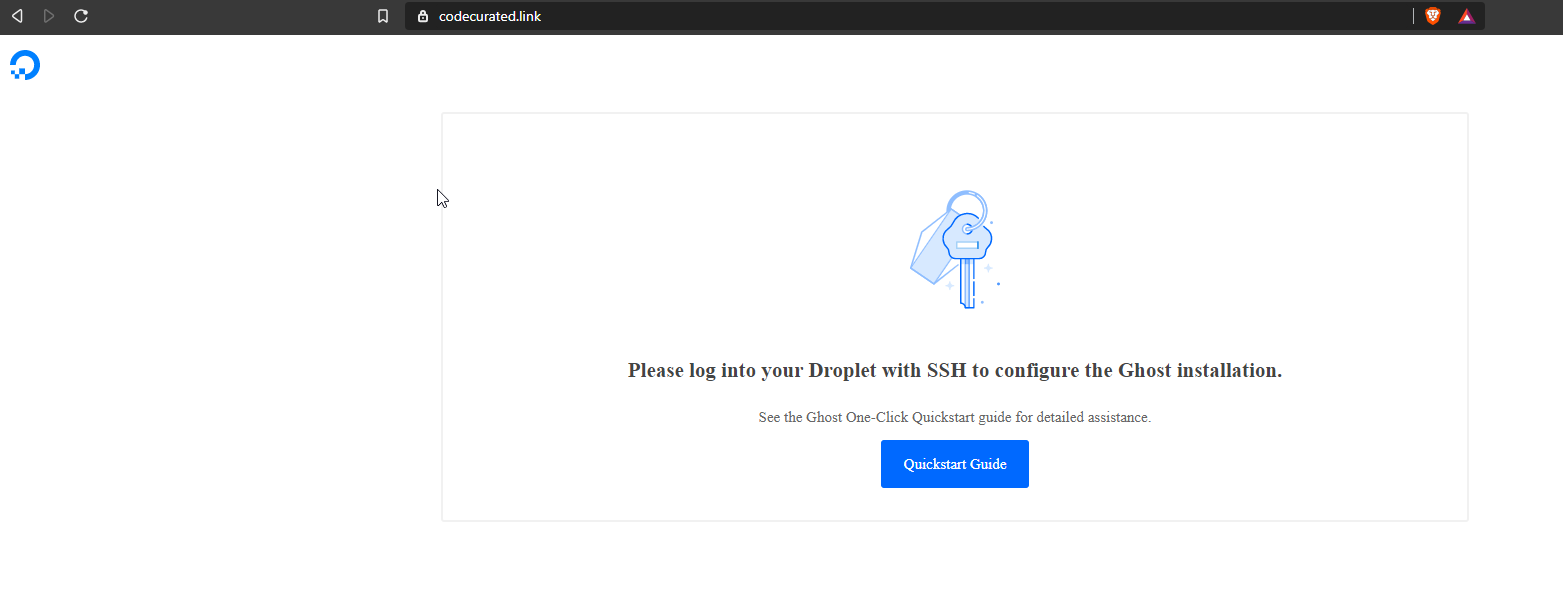
Congrats! Now your domain is pointing to your droplet via CDN.
Setting up SSL/TLS
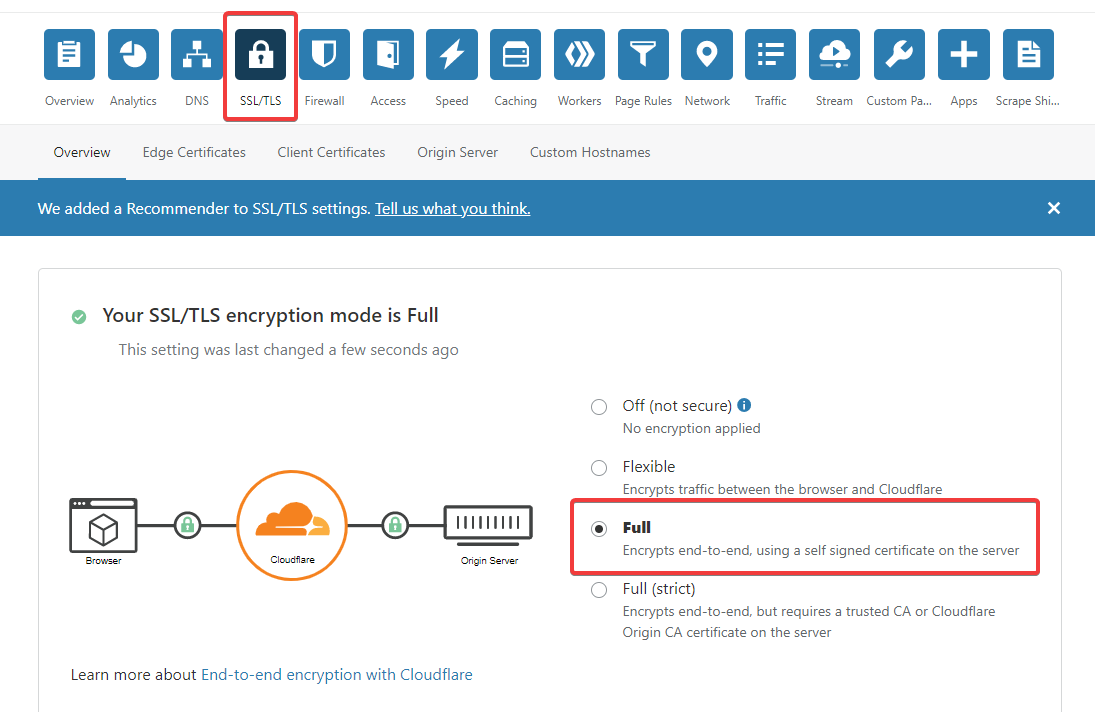
Before going back to our droplet setup, we must configure one more thing, SSL. You need to configure the SSL in the Cloudflare so it can know that your droplet has a SSL certificate.
To configure your SSL, go to the SSL/TLS tab and choose Full.
And you're done! If you open your website now it might not work, but no worries, it will work again after we're done with our Ghost installation. Let's move on to the next step!
Configure Ghost installation on DigitalOcean
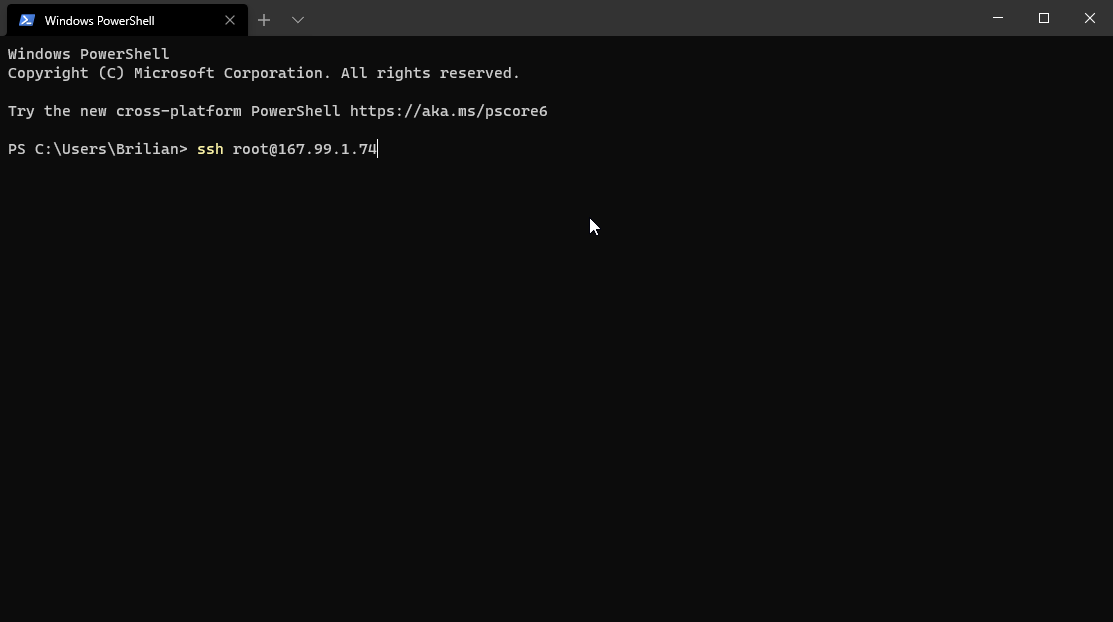
Okay, it's time to do an SSH to your Ghost droplet. First, copy the IP of your droplet.
After that open windows powershell or terminal and type ssh root@{your-droplet-ip}
If you're warned about authenticity of host, then type yes.
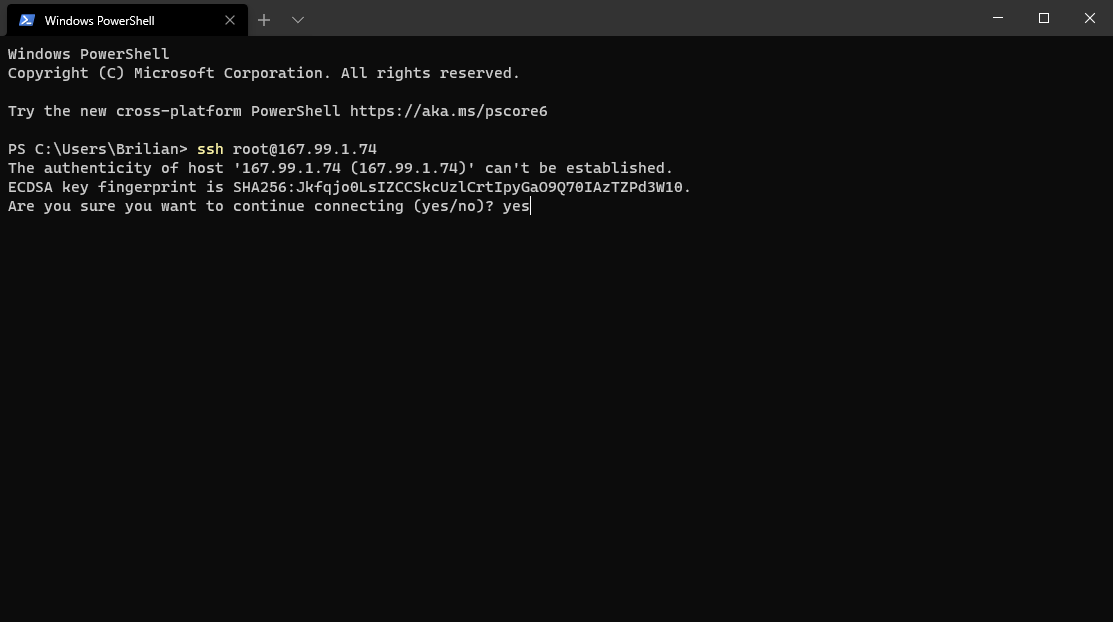
If you’re using a password for your droplet’s authentication it might prompt you to input password. If you’re using SSH key, then you should be able to access your droplet inputting nothing.
The droplet will begin installation automatically and should stop at this screen:
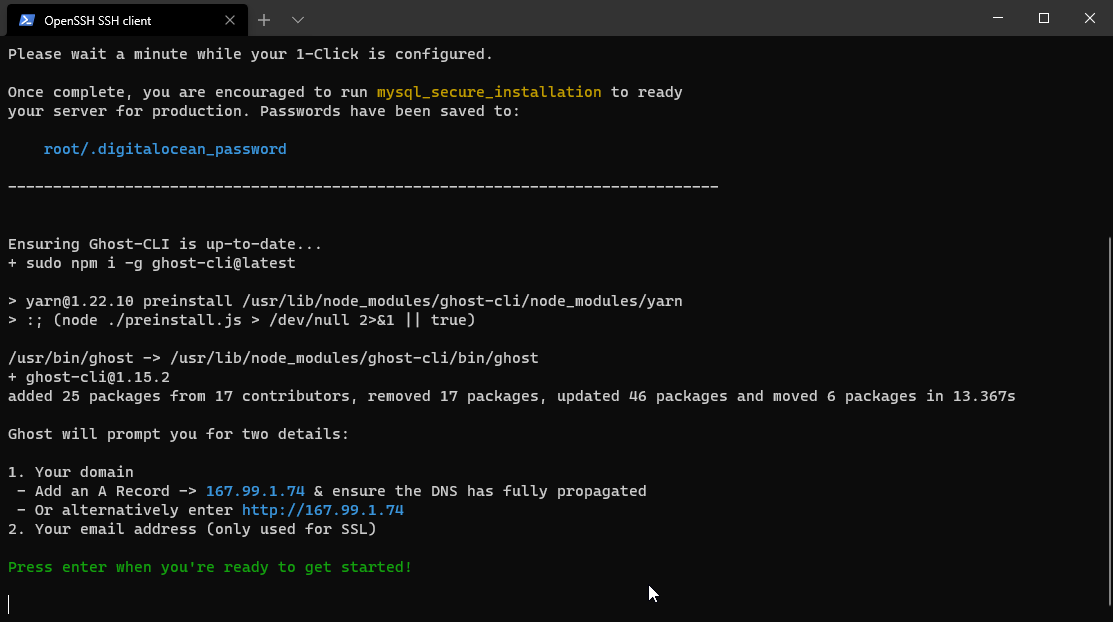
Just press enter on your keyboard and it should start the installation process again. After a while it will prompt you to insert your blog URL, insert your domain here.
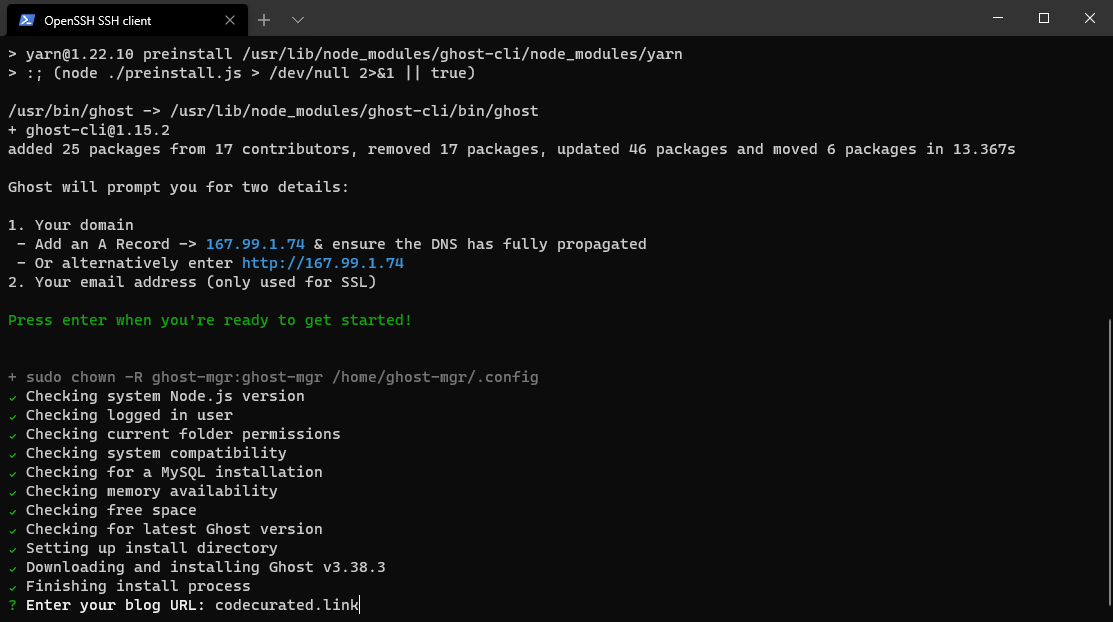
After that, it will ask you to input your email for SSL certificate. SSL certificate is very important for website security. Having it on your site will also boost your SEO score.
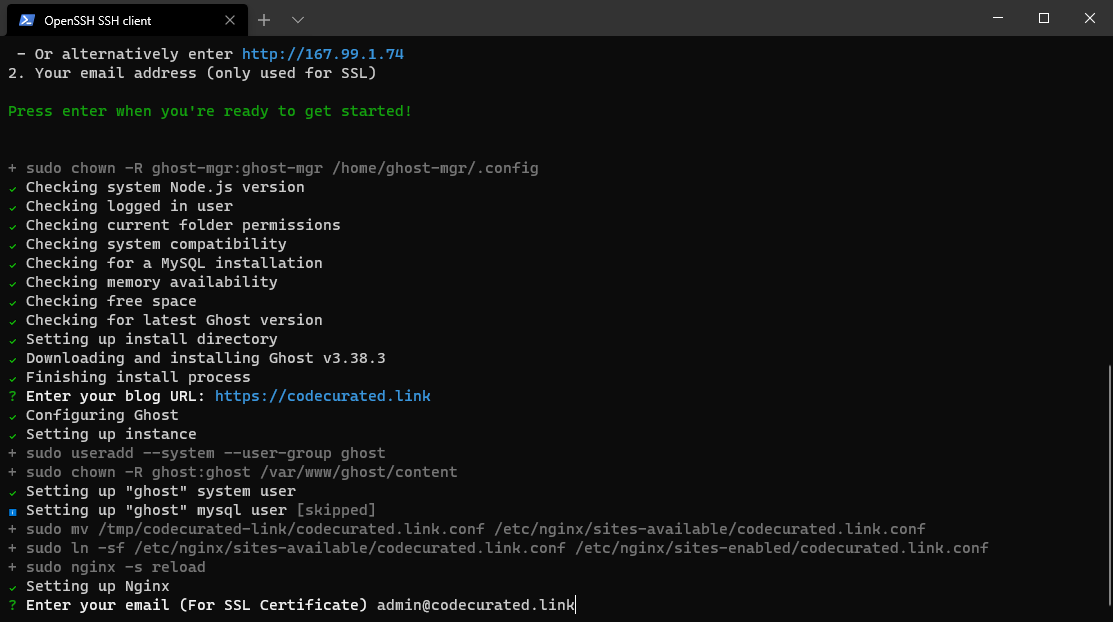
When the droplet finishes setting up Ghost, should see the screen below.

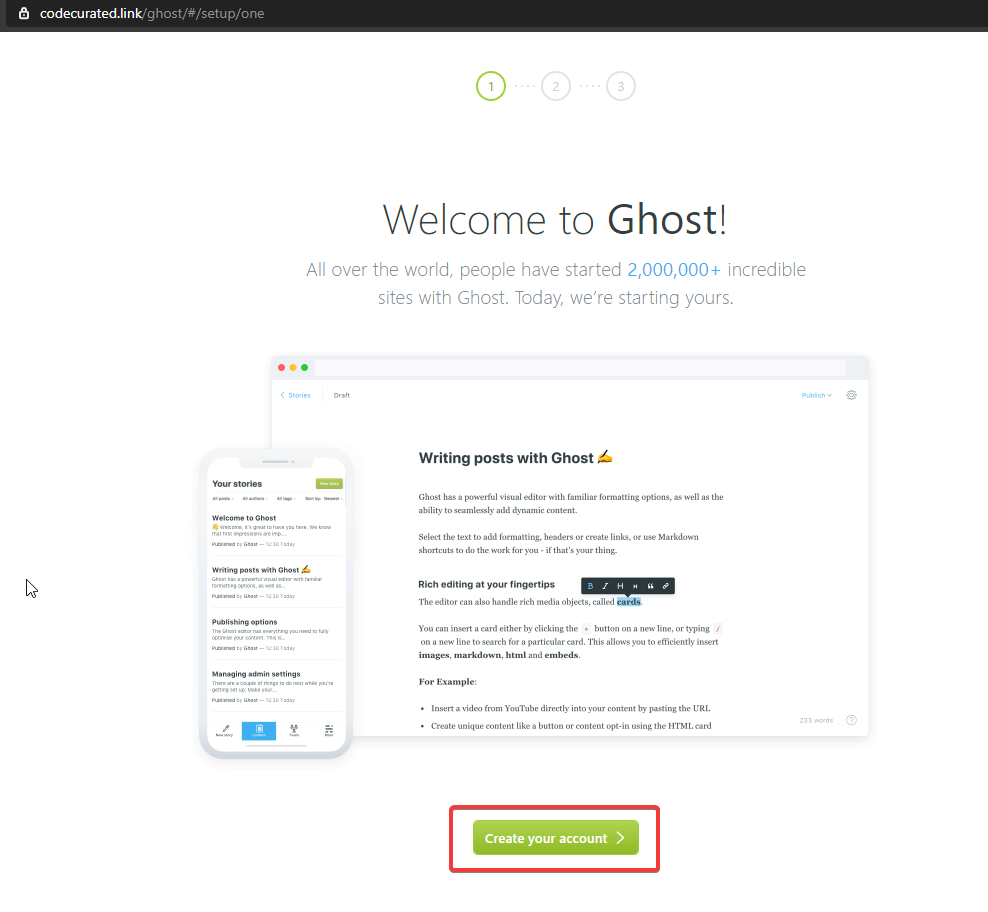
Now, you can see Ghost homepage when you open your domain. Congrats!

I also plan to write about how to configure email to your Ghost droplet, so wait for it.
Setting up Ghost Admin
To set up admin page you must go to {your-domain}/ghost. Ghost will prompt you the page below, click "Create your account".
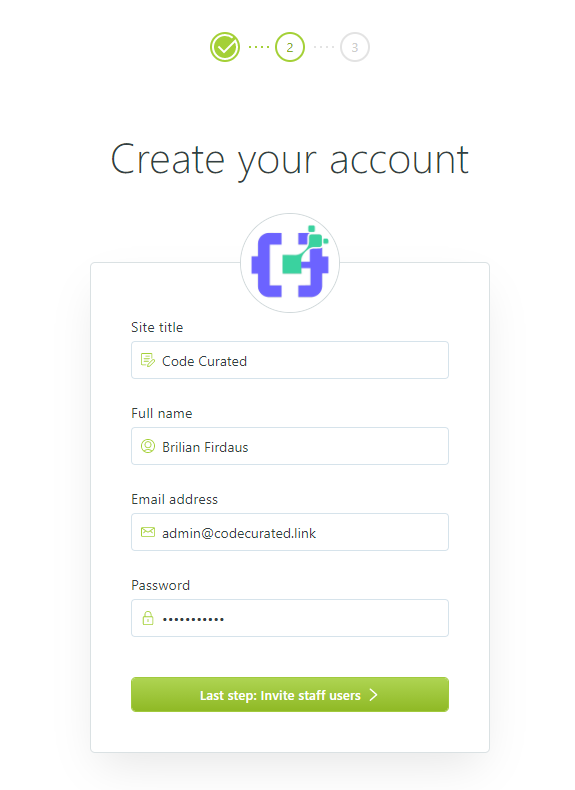
Fill out the form as you want, we will use this for the admin account of your blog. After you're done, click "Last step".
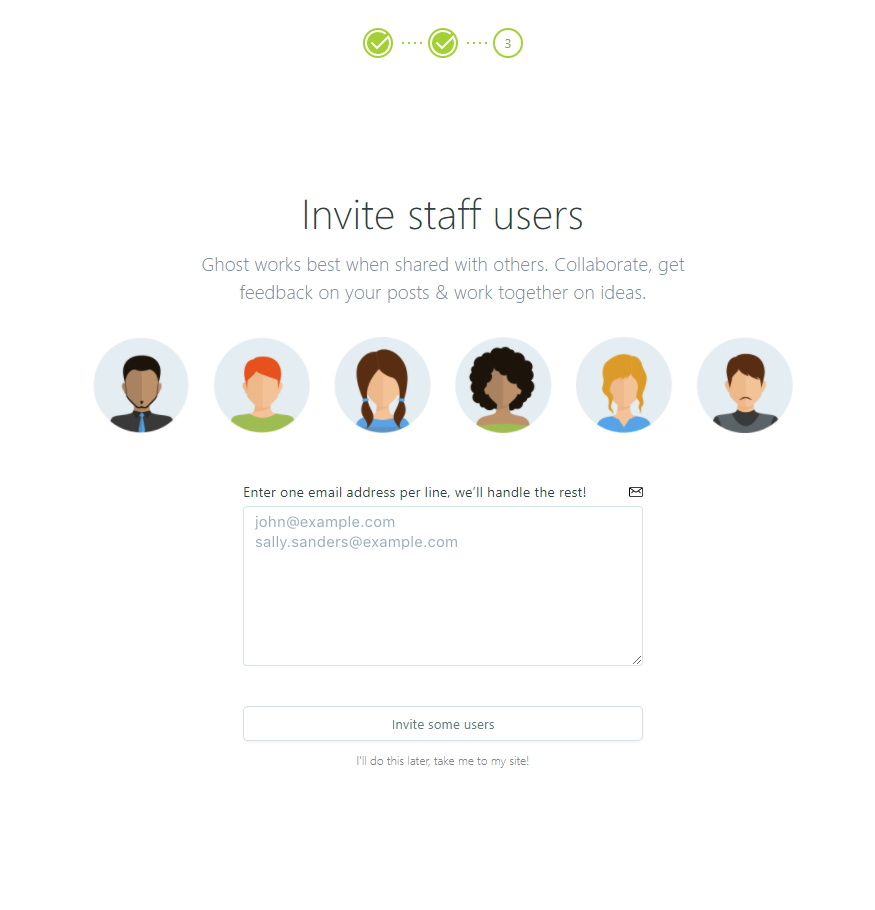
In this step you can invite your blog's author/editor/contributor. If you don't have one, you can do this later.
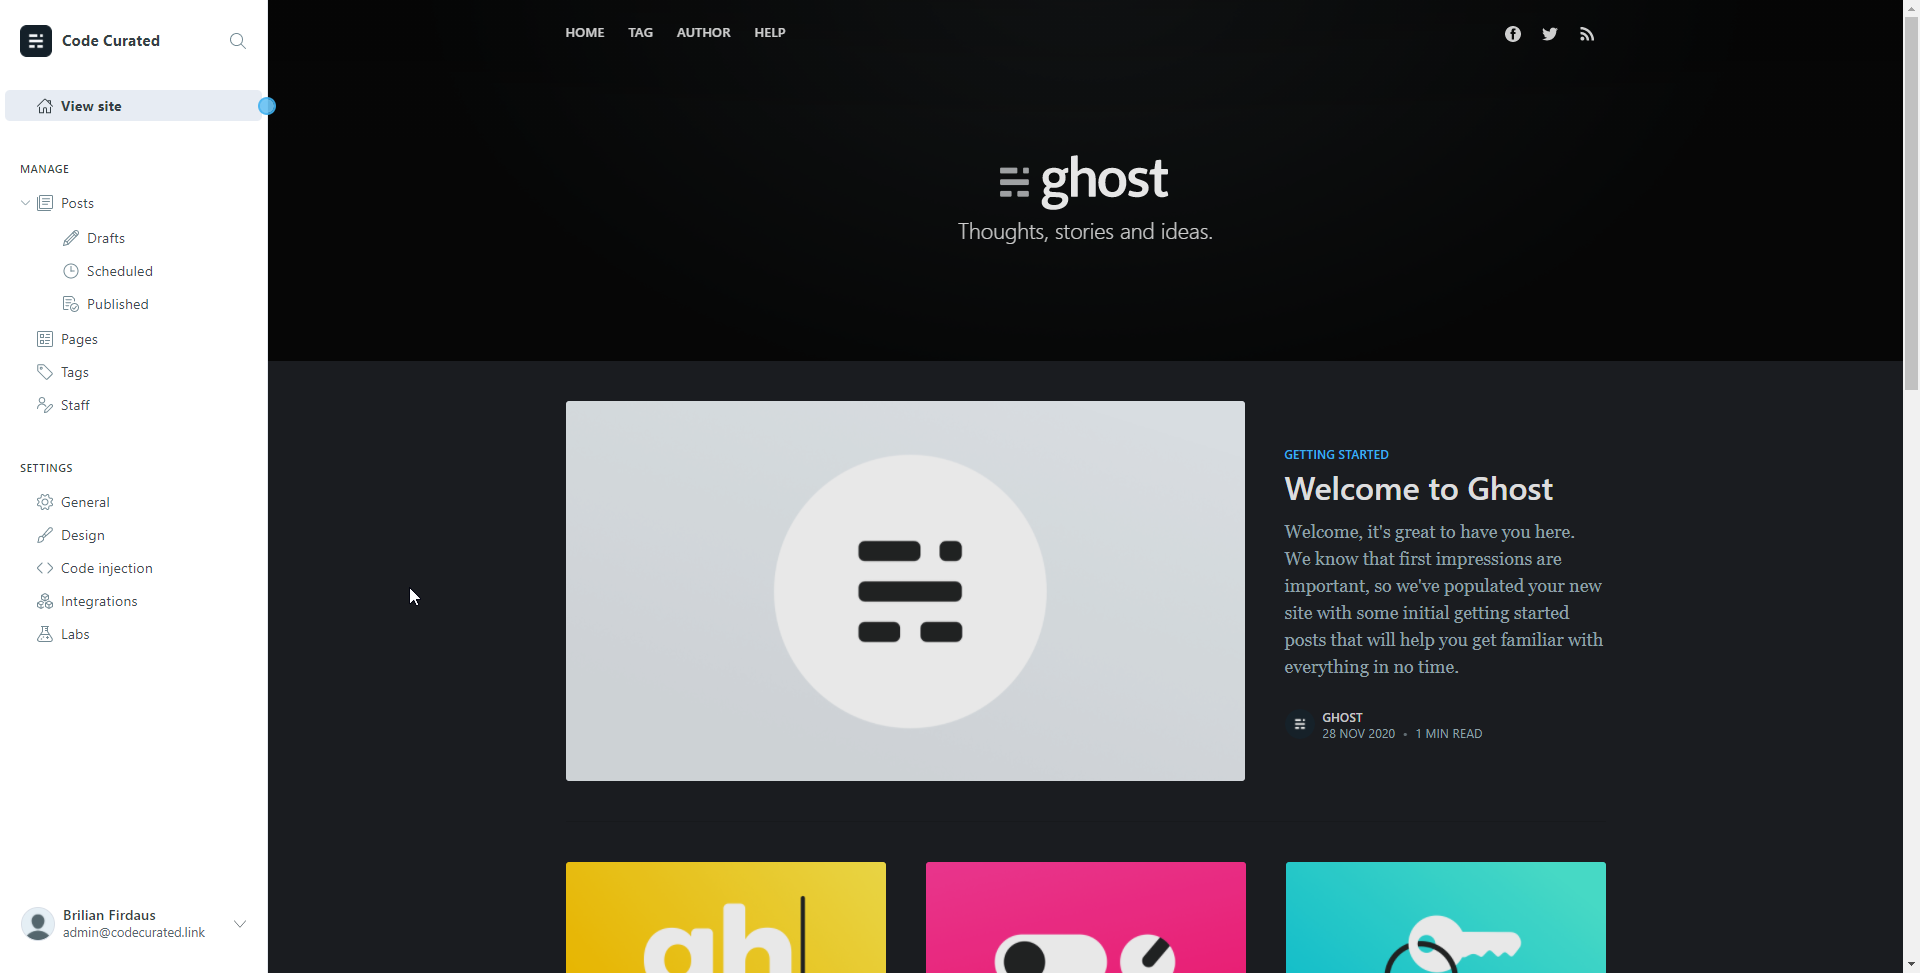
After that Ghost will take you to your admin page.
Congrats! Now you have your Self-Hosted Ghost fully setup!
What's next
Thank you for reading until the end! Now you can set up yourself a Ghost website. There are still many things I want to write about Ghost like setting up google analytics, configuring routes, configuring robots.txt, configuring email and configuring membership. Be sure to subscribe to Code Curated newsletter for other ghost tutorials!


