For the past years, Docker has been disrupting the Developers and DevOps field. Many people think Docker is a programming language or framework. But it is not. Docker is an open source platform for building, shipping and running containers. It is a tool that allows you to manage images and containers. Because of that, before we learn about Docker, it’s better if we learn about container first.
Containers
Container is a standardized unit of software allowing developers to isolate their app from its environment. By using the container, you don't need to think about the dependencies of your app clashing with each other anymore. In the container, every dependencies an app needed can be installed with it and also isolated in the container. By using it, we can guarantee an app that runs in one container can also run in the others.
Advantages of using container
So, why do we even use container? What benefits does it give to us? Well, to answer it simply, because of isolation and limitation.
By using the container, we can isolate specific apps with the other components in the host machine (The machine which we use the docker on). By default, the container won’t be able to access any of the host machine storage and the same thing applies vice versa. There are many things that isolation and limitation behavior solve, but let’s focus on two main things: dependency conflicts and limiting malware damage.
Avoiding dependency conflicts
I’m pretty sure everyone had experienced a dependency conflict on their personal computer. When you install a good deal of software in your PC, there is a chance of a conflict between the dependencies of the software.
For example, you want to install a new software called software A and software B. Software A requires you to have a python 2.1 installed within your PC, while software B requires python 2.3. When you’re installing Software A, it works perfectly. But, after you’ve installed software B, your PC replaces the python 2.1 with version 2.3. Because some features are different between the python 2.3 and 2.1, software A might not work anymore. This kind of thing often happens in the production server too. To make everything work perfectly, you’ll need to work around the dependency conflict.
We can avoid the dependency conflicts by using container in your app system. Containers are isolated with each other and even their host machine, so dependency conflicts are not possible to happen.
Limiting the damage of Virus
Accidentally or not, some software you use might contain a virus. If a software with virus is run without using any resource isolation, it will be able to access the whole host machine. If it's run inside a container though, it won't be able to access anything more than it allowed to. Because of that, you can think of container as a jail for the running process inside it. Within a container, the virus won’t be able to access files outside of the container. It also can’t access the hardware resources (CPU and Memory) easily because container can also limit the hardware resources container uses.
The differences between container and virtual machine
If you’ve been a developer for some time, chances are you’ve heard, or even use a virtual machine. Containers and Virtual Machine are pretty similar, they both isolate and limit a process within them. So, why use containers as opposed to virtual machine?
VM is a piece of software that is hosting a whole OS in it and runs on top of a physical machine called Hypervisor. While, container provides a isolated space that runs on top of its host OS.
The most important advantage of containers is the speed of initializing a new instance. Creating VM needs minutes because it needs to create a virtual disk, install OS, allocate resources, etc. Containers use your host machine’s OS, disk, ram, CPU, etc. This makes creating a container quick, usually in the matter of seconds.
Another reason is because of its portability. In docker we can use the image for packaging the data of a container (we’ll learn it later in this article). For VM though, if you want to package it, you’ll need to wrap the whole OS with its system data, producing a package with enormous size and is not really portable.
One thing to note is that nothing wrong with containers inside of VM. Actually, many people use it like that. You can rent a VM inside a cloud server like GCP, AWS or DigitalOcean and run many containers inside it.
Docker Introduction
As we learn in the previous section, Docker is an open source for Linux distribution. Docker run on top of Linux OS by default, even on Windows and MAC. Because of that, when we install Docker on Windows or Mac, Docker will ask you to install a Linux VM so it can run on top of it.
Note: Currently Docker is not supported in Apple's new M1 CPU architecture. There is a developer preview, but it isn't stable yet.
Hello world with docker
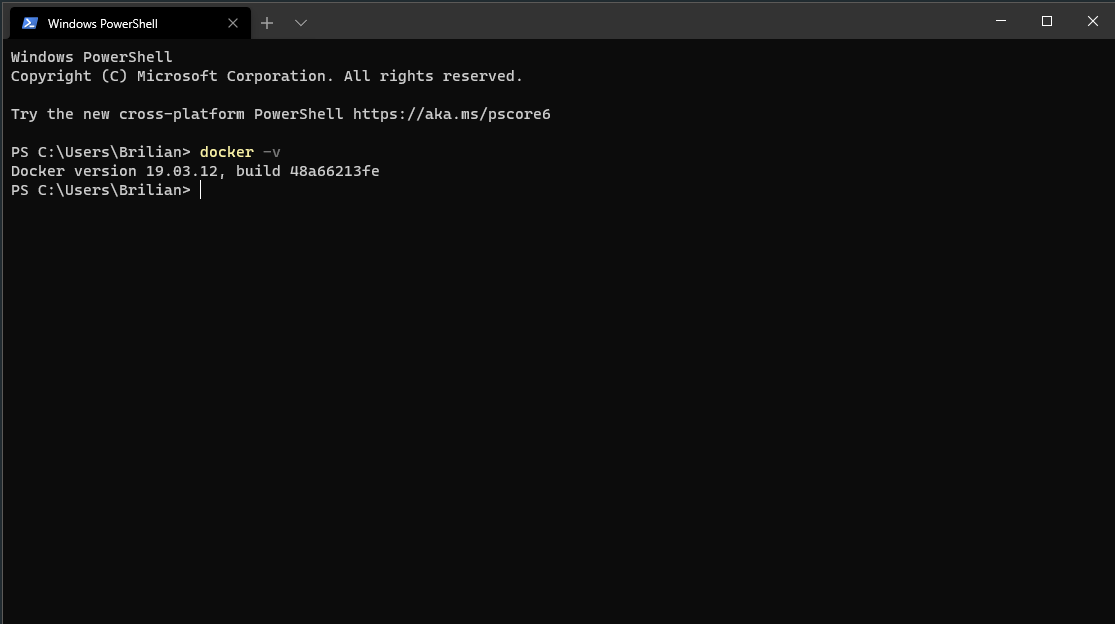
For this section, you'll need to first install Docker Desktop from https://www.docker.com/products/docker-desktop. After you've done installing it, you can verify your installation with command docker -v
. In my case, I'm using windows and my installed docker version is 19.03.12
.

After you’ve successfully installed Docker, you can try running a hello world docker image with docker run hello-world
. You should get the result like below:

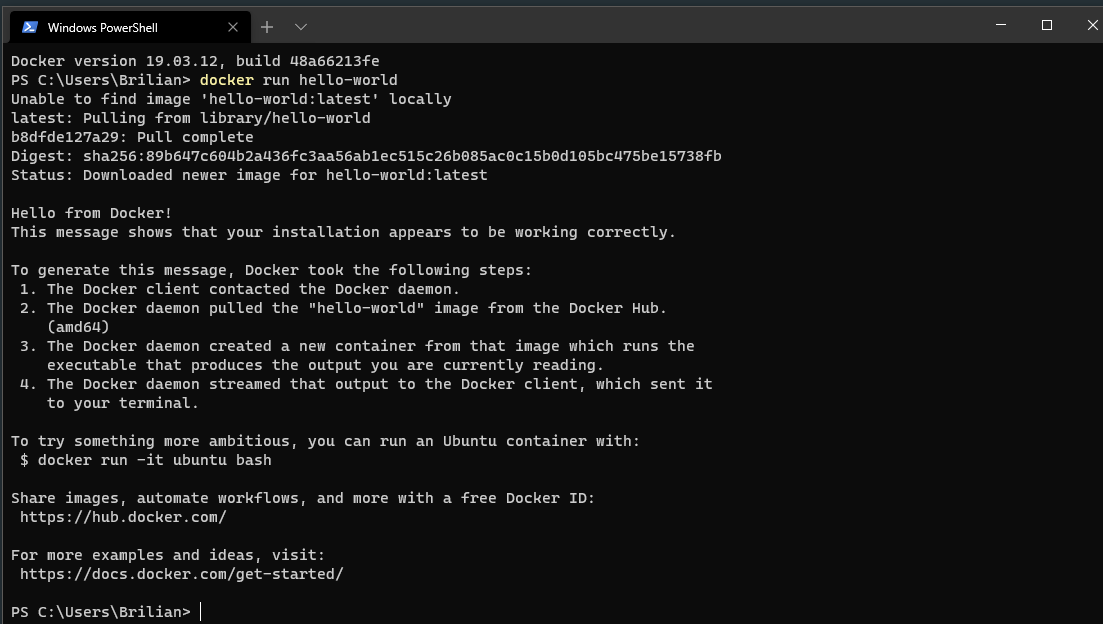
So, what do you think about the result? Have you noticed the line Unable to find image ‘hello-world:latest’ locally
? What actually happened when we run the previous command?
The first thing you need to know is docker image. Docker image are basically a snapshot of an container that has been configured previously. In the hello world’s image case, it’s configured to show the message as soon as the container is started.
So, what happened when we run the command?
- Docker get the
docker run hello-world
command. - Docker will check whether the
hello-world
image is in the image cache. - Image cache return nothing, showing that the
hello-world
image is not in the image cache. - Docker will check the Docker hub (Docker public repository) for
hello-world
image. - Docker hub found an image tagged with
hello-world:latest
name and return it to the Docker in your machine. Note that by default will get thelatest
tag if you don’t specify the tag version. - Docker will then create a container from the image it gets, displaying the output in your terminal screen.
Docker basic commands
Now that we understand how to run an image with docker run, let's learn some basic commands of Docker.
Docker run
We’ve used docker run
before for our hello world example. docker run
is basically a combination of docker pull
, docker create
and docker start
. To put it simply, docker pull
is used to pull an image from Docker registry to your image cache, docker create
is used to create a container based on the image, and docker start
is used to start a container.
docker run
has many parameters you can send to it, some most used one and we will use in this article are --rm
, --name
, and -it
.
When you start a container with --rm
container, Docker will remove your container when it is stopped. This is useful if you want to keep your machine clean from unused containers.
--name
will give container a name. If you set a name to a container, you then can interact with the container by its name instead of just its id.
What -it
argument do is basically to expose the input and output of the container so you can interact with it.
Running with custom command
When creating a docker image, you can specify a default command that will be executed when you’re running the container from an image. For hello-world
image, its default command will open a script that displays some output in the container. But what if the image doesn’t have any default command? Or, if we want to use a custom command instead of using the default one?
For the example in this section, we'll use busybox
image, which is an image that provides several Unix utilities. busybox
doesn't have a default command, which makes it perfect for the custom command example.
Let’s try running the busybox
image with docker run busybox
.

Note: There will be an image pulling process if you haven't run the busybox
image before. I’ve run the busybox
image before, so there isn't image pulling process.
Nothing happened, right? There is a slight delay after you typed the command, but it displays nothing after that. busybox
doesn’t have a default command, so it just stop itself after we ran it.
Now, let’s try docker run -it busybox /bin/sh

Something happened! We're actually accessing the container now! As we learn in the previous section, the -it
arguments do is basically to expose the input and output of the container so you can interact with the container.
The /bin/sh
is the command you want to run when the container started. If you have some basic understanding of Linux, you will know what it does, it basically will start a shell.
Now, let’s leave this terminal open, and open a new one.
Docker ps
Docker ps
is a command that will display every running container. If you want to display a non-running container too, you can add an -a
argument.
Since we’re still running the busybox
container, let’s use docker ps
so we can see its information.

Docker exec
If you want to run a command in a running container, you can use docker exec. Let's try docker exec -it fcd /bin/sh
.

You might wonder, what does the fcd
in the command mean? The fcd
is actually the starting letter of the busybox
container id we run before. We can see the container id printed as fcd21cffad6e
previously when we tried docker ps
. Docker is a really smart software, it is able to identify which container are you pointing to even though you don't type the whole id. As long as it's unique enough, the docker will be able to identify the container.
Now you can test that both of your terminal is accessing the same container by creating a folder and seeing the folder is also created in the other terminal.


In the first image, I created a directory called testing
in the first terminal. After that, when I do an ls
command in the second terminal, you can see that the directory is also there.
Docker Logs
For this section, to better visualize what the docker logs
command does, let's use a redis
image by running docker run -d redis
.
docker logs {containerId}
can be used to see the past console output of a container. If you want to follow the logs, you can also add --follow
argument. Let's see what our redis
container that we just run outputted by using docker logs 82
. Note that the container id in my machine and yours will be different.

That's it for the basic command of Docker. If you're interested in other commands, you can check them in the docker cheat sheet here.
Working with volume
Let’s jump in to the working with volume section. In this section there is only one thing I think you should know when you just started learning Docker, volume mounting.
Volume mounting is basically a way to connect your host OS’s volume with your container’s volume. This is a very important thing to know if you’re going to use Docker to host a container with a persistent data storage. Without mounting the volume of your container to your host OS, your data will be wiped every time you update your image or create a new container.
To show how this works, let’s use the busybox
image again. But before we start the container, create a folder somewhere in your machine, in my case, I’ll create a folder in D:/docker/test-busybox-volume
. Let's also create a simple text file inside the folder we just created and name it whatever you want, I’ll name mine mounted.txt
.
It’s time to start busybox and mount it to the folder that we’ve previously created! To use the mount volume feature, we can use docker run {image} --volume={src}:{dst}
. Let’s try docker run --volume D:/docker/test-busybox-volume:/test-busybox -it busybox /bin/sh
. Go to the /test-busybox
directory and list the file inside using ls
. You should see the file that you’ve just created.

Working with network
There are two important things you need to know about networking in Docker. The first one is how to expose a port from the container to host OS. The second one, how containers can communicate with each other.
For the example in this section, we’ll need an image with an exposed endpoint. I’ve created a simple image called brilianfird/node-mock-endpoint:1.0.0
we can use for our case. The image contains an app that listens to port 8080 and will return simple {"success": true}
response when it’s hit.
Exposing a port
Exposing a port from your port to your host OS is easy, you can add --port {to}:{from}
argument when starting a container. Let’s try it with brilianfird/node-mock-endpoint
image: docker run -p 8081:8080 brilianfird/node-mock-endpoint:1.0.0
. After that, try opening localhost:8081 in your browser, and you will see the response.
Communication between containers
It’s very normal these days for services to connect to each other because of the microservices popularity. Most of the app also needs to connect to a database to operate properly. If containers is isolated then how they can connect with each other?
For the containers to connect to each other, they’ll need to be in the same docker network. In this article, we’ll use a very simple bridge network which can connect containers. If you're interested in other kinds of network, you can read about it in the Docker documentation.
Let’s create a basic network with docker network create my-network
and inspect it with docker network inspect my-network
.

There are many configs in a network, but in our case, Docker assign everything by default because we didn’t specify them. We won’t deep dive about what each configs does. The only thing you need to know is that “bridge” Driver will enable the containers within it to communicate with each other.
We’ll use two containers for this step, node-mock-endpoint
and alpine
. First, let’s start the node-mock-endpoint
images attached to our newly created network by running docker run --rm --network my-network --name my-endpoint -d node-mock-endpoint:
1.0.0
. Notice that we named the container, this is a very important thing to do to make other container call this container easier.

The next step is to run an alpine
image. We'll then install curl
in the alpine image and we'll try to access our node-mock-endpoint
image from it. Let's run docker run --network my-network --rm -it alpine /bin/sh
to create a new container. After you've got in the container, run apk add curl --no-cache
to install the curl
command in your container.

Now, how do we call the node-mock-endpoint
container? Well, when you created a container in a network, the docker network will automatically assign a private IP to your container. The docker will also add an alias to the IP according to the container’s name. So, if you want to call a specific container, you can just call its name.
Previously, we've named our node-mock-endpoint
container as my-endpoint
. Since we can use the container's name to access it, we can just curl to my-endpoint
and see whether it returns a response. Let’s run curl -XGET my-endpoint:8080
.

You should see the response {"message":true}
from the my-endpoint container if everything went fine.
Creating our own image in Docker
Until now, we’ve only used the image that already exists in the docker hub. But how do we actually create our own image? Well, in this section, we'll learn how to create our own image! We’ll create a simple alpine
image that has a curl
pre-installed in it and will run curl --help
as its default command.
We’ve mostly only use custom command to get inside a container’s shell. But, remember that we can run any command that is compatible with the image, like installing the curl.
Let’s run an alpine
container, this time we’ll install the curl without going in the container. Let’s also name the container alpine-curl
. For that, we can run docker run --name alpine-curl alpine apk add --no-cache curl
.
Now, we have an alpine
container that has curl
installed, to create an image from it, we can use docker commit
command. First, let’s see how to use the docker commit
by running docker commit --help
.

From the help response, we know that to use docker commit we’ll need to at least specify the container, repository, and tag. The container is just the id or name of the container you want to create an image from. Repository is the name of your image, it’s usually has the format of {company-name}/{image-name}
. Tag is basically a version of your image, by default docker will use latest
tag.
Now, back to our image. What’s remaining to do is to add the default command to our alpine-curl
container. To do this, we can use the --change
parameter with a CMD value in it when we commit. Let's run docker commit --change='CMD ["curl", "--help"]' alpine-curl brilianfird/alpine-curl:latest
. Note that I used my docker’s handle name as the {company-name}
, you can use the same one or change it to your docker’s handle name. We can then try running the brilianfird/alpine-curl
image by using docker run brilianfird/alpine-curl
, and we should see the curl help information.
Note: if you’re using windows and you're getting /bin/sh: [“curl”,: not found
when running the image, try to commit the image in your WSL terminal.

Nice! Now our image is done! We created an image alpine-curl
based on alpine
image and installed curl command in it. We then also added a default command curl --help
that will be executed if we run the image!
Do you feel that creating an image is pretty complicated with all the command you need to remember? Well, you’re not alone, I also think of that! Thankfully, docker provides easier image creation process with Dockerfile.
Creating an image with Dockerfile
With Dockerfile
, you can encompass all the docker commit command within a single file and simpler syntax. Let’s create one for the alpine-curl image we created earlier.
First, let’s create a folder and name it alpine-curl
. Then create a file named Dockerfile
(without extension) inside the folder we've just created and insert the following text in it:
FROM alpine
RUN apk add --no-cache curl
CMD ["curl", "--help"]
After you're done with it, run docker build .
command inside the alpine-curl
folder. You'll get an image id and if you try to run it, you'll see the curl help information.

One more thing we need to do is to change the image's name, we can use docker tag for that, try running docker tag 63 brilianfird/alpine-curl-dockerfile:latest
(remember to change the image id).
After you've tagged the image, you can check whether it's properly tagged by using docker images
.

How’s that? It’s very easy now to create an image, right? Dockerfile
is also the one you usually use to create an image of a development project.
Docker compose
We’ve only talked about how to create a single-container application until now. What if we want to create a multi-container one? Well, Docker got your back too! You can use Docker compose to create a multi-container Docker application.
Docker compose is usually used for cases like development and testing stage of an application. By using Docker compose, if your application has dependency to, for example, a mongo repository, you won’t have to install the mongo in your machine. You can just add it to your docker compose file, and every time you run it, your application will start with the mongo service. Docker compose will also make your life a lot easier when doing testing, especially integration testing. With it, you can be sure that the dependencies of your application in local environment are the same with the one you’ll use in production.
We’ve used the node-mock-endpoint
and alpine-curl
for the examples before. So for this section, we’ll use the same. We’ll create a docker compose that will run both node-mock-endpoint
and alpine-curl
with a single command and try whether they’re working as we expected.
For the example in this section, let’s first create a Dockerfile
:
FROM alpine
RUN apk add --no-cache curl
CMD ["ping", "google.com"]
The reason we'll be pinging google is so that the container won't immediately exit when we run it.
Then, create a docker compose file, go to your previously created alpine-curl
folder and create a yml file named docker-compose.yml
.
version: '3'
services:
alpine-curl:
build:
context: .
mock-endpoint:
image: brilianfird/node-mock-endpoint:1.0.0
Let’s discuss the docker-compose.yml
line by line.
- The first line is “version”, this determines which version of docker-compose you’re using.
- services determine the services/images you want to run
- “alpine-curl” and “mock-endpoint” is the service name, you can name this whatever you want
- “build” asks docker to build a Dockerfile for the specified service. You need to specify which Dockerfile will be built in the context. Since we’re using the default Dockerfile name,
Dockerfile
, we can just put a dot in there. - “image” means that you’ll run an image in the service, you can specify the repository, image name, and tag in there.
Notice that we didn’t specify any network, when you’re using docker compose, every container in the docker compose will be able to communicate with each other by default. So, even if we didn’t specify any network, alpine-curl will still be able to communicate with mock-endpoint.
Now let’s start the docker-compose by running docker-compose up --build
in the terminal. The --build
parameter is optional here, but if you change something in the Dockerfile/docker compose file, it’s better if you add the parameter to force docker compose to build your Dockerfile.

With the docker-compose up
command, the docker will parse the docker-compose.yml
and create the containers of the defined images in the file.
To prove that both containers can communicate with each other we can open a new terminal get inside the alpine-curl
container by running command docker exec -it alpine-curl_alpine-curl_1 /bin/sh
. Inside the container, try using a curl command curl -XGET mock_endpoint:8080
, and you should get a {"message": true}
response. The reason you can call the mock_endpoint
is that Docker automatically resolves the services name to its private IP.

Conclusion
Docker is a very important component to learn for both software developers and DevOps. It’s de facto standard when working with containers, which have so many advantages when used compared to not using one.
We’ve learnt the basics about container and Docker in this article, the next step is to learn how to use it in the real development project and also learn a Docker/container management system, Kubernetes. Be sure to subscribe to Code Curated’s newsletter so you don’t miss it if there is a new article about docker in the future!
At last, I’d like to say thanks to you for reading this article until the end! I hope you enjoyed this article and get something from it!